
Part 3: Activities
Using Groups
Groups are a great way to break larger classes into manageable sections for assessment, group assignments, and to facilitate better discussions. Groups are eminently useful, though an infrequently used D2L tool.
The Groups Tool in D2L will help you build groups, individually assign students to those groups, or automatically populate a group. Groups can then be assigned their own discussion boards and even their own Dropboxes for group projects.
Create Groups Categories
Your class can be split into groups in different ways. Students can belong to multiple groups within a class and each type of groups can have its own settings. This is done using categories. For example, you may want to assign students to groups for discussion and but allow them to self-enroll in a group for a group project. In this example, you would set up two categories, one for this discussions and one for the projects. The different categories would have different settings for enrollments.
To create a category:
Step 1:
Click on Course Admin in the Navigation Bar, then Edit Course.
Alternatively: Groups can be found in the Communication sub-menu located on the NavBar.
Step 2:
Choose Groups under the Learner Management heading.
Step 3:
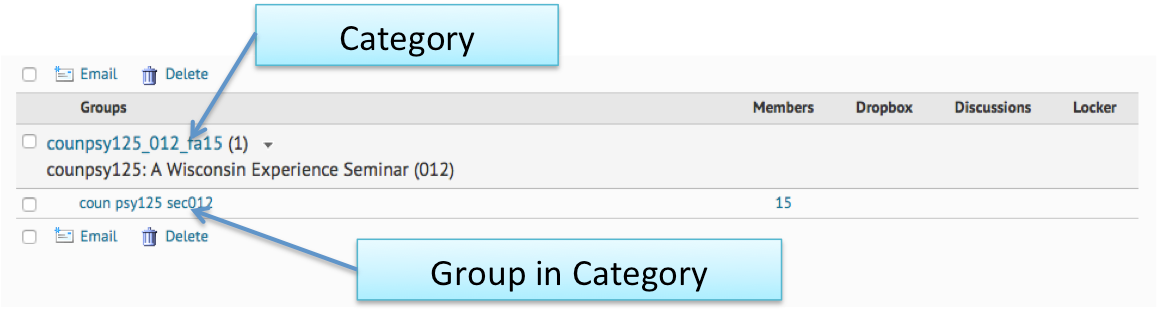
On the Manage Groups page you will notice that your Group tool already has a Category, and sub group/s associated with that category. The University’s Student System automatically creates a groups for your class when it enrolls students. Notice, however, how the list is organized:
Step 4:
Click on the New Category button at the top of the group tool.
Step 5:
Name the Category and provide a description if you wish.
Step 6:
Select the Enrollment Type from the drop down menu.
Notice that when you select different Enrollment Types, the Group preferences listed below the Enrollment Type box (Number of Groups, or Number of Users) will change depending on the type you select.
Step 7:
Choose to have group work spaces automatically generated under Additional Options. Here, D2L will create new discussion areas, or Dropbox folders for each group.
Enrolling students when using the “No Auto Enrollment” Enrollment Type.
Step 1:
Navigate to the Group Tool by clicking on Course Admin, Edit Course and selecting Groups under the Learner Management heading.
Step 2:
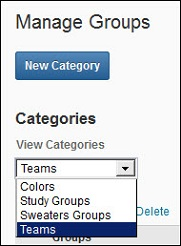
Select the Category from the View Categories dropdown menu.
Step 3:
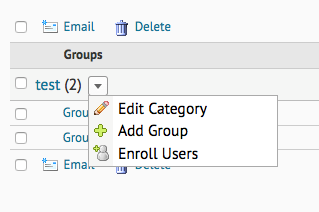
Click on the small black arrow next to the Category title in the group list. The choose, Enroll Users
Step 4:
You will now see your students listed alphabetically in the first column. The groups will be listed across on the right side of the screen. Click the box of the group in which you wish to enroll a user. You can also remove a student from a group by clicking in the box again to uncheck the box.
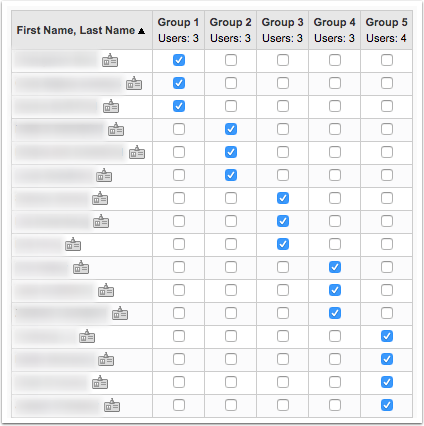
Finally, click Save.
Edit Group
You can edit a group after it has been created.
Step 1:
Click on the group name from the group list in the Manage Groups page.
Step 2:
In the Edit Category page you can change the group name, its description, or create new workspaces for group members.
Finally, click Save.
