Pressbooks 101
Parts & Chapters
Pressbooks uses a hierarchal structure to organize the content of your book. Each book comes with Front Matter, Parts, Chapters, and Back Matter. The Front Matter and Back Matter can be customized, but not removed from your book. Parts and Chapters, however, can both be customized and removed from your book. Parts make up the top level of the structure of Pressbooks and Chapters nest underneath them.
In this chapter, you’ll learn how to:
- Add a Part or Chapter
- Organize Parts and Chapters
Adding Parts & Chapters
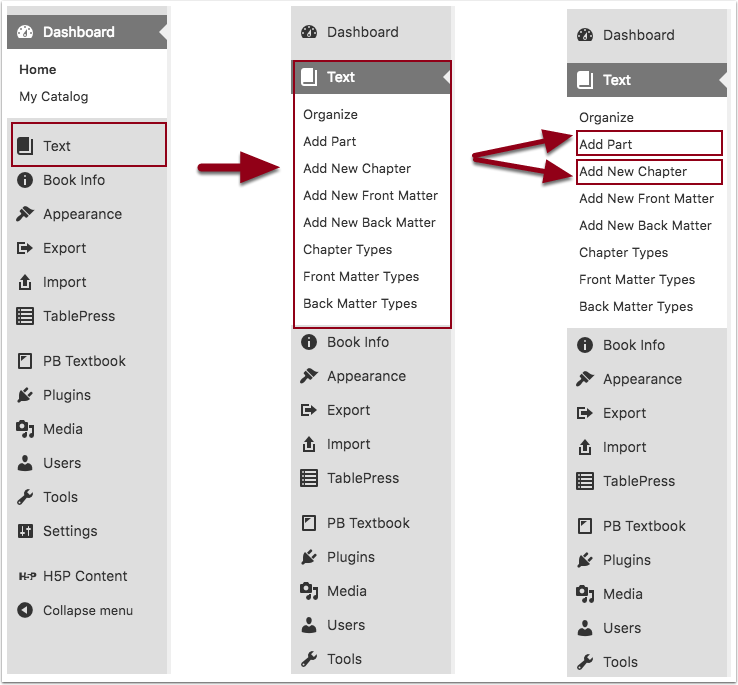
To add a new Part or Chapter to your book, start by clicking Text on the left side menu. This opens up the menu tray for your text. Click Add Part (or Chapter) from the left side menu.
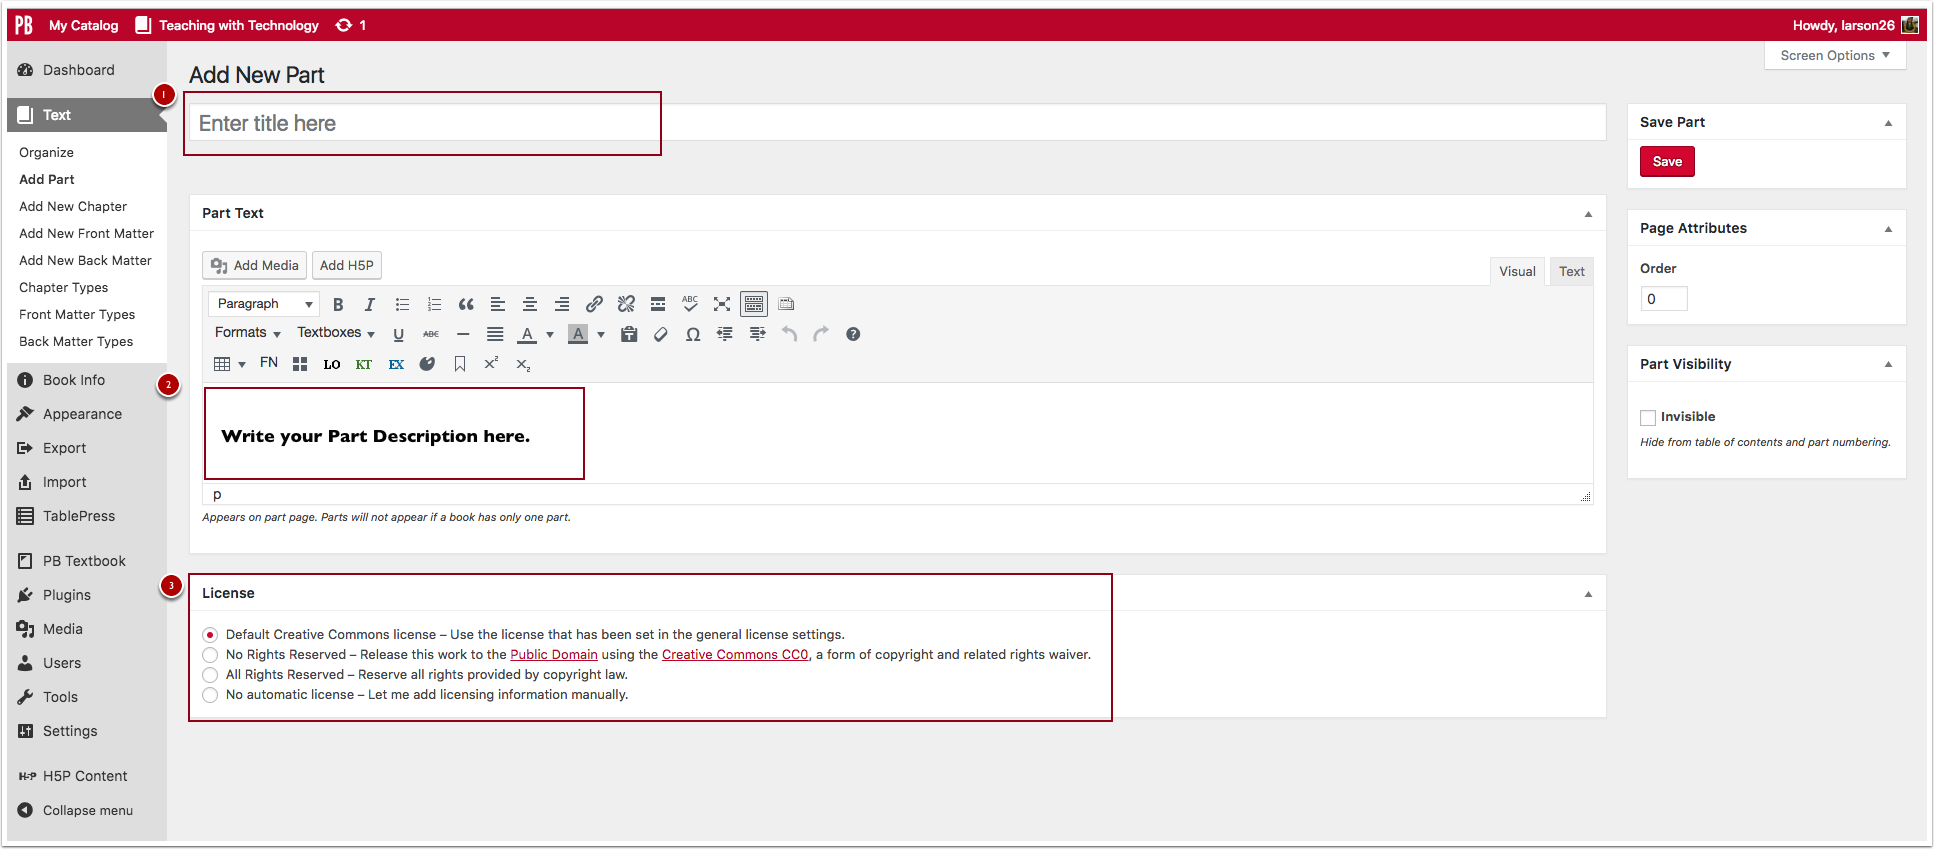
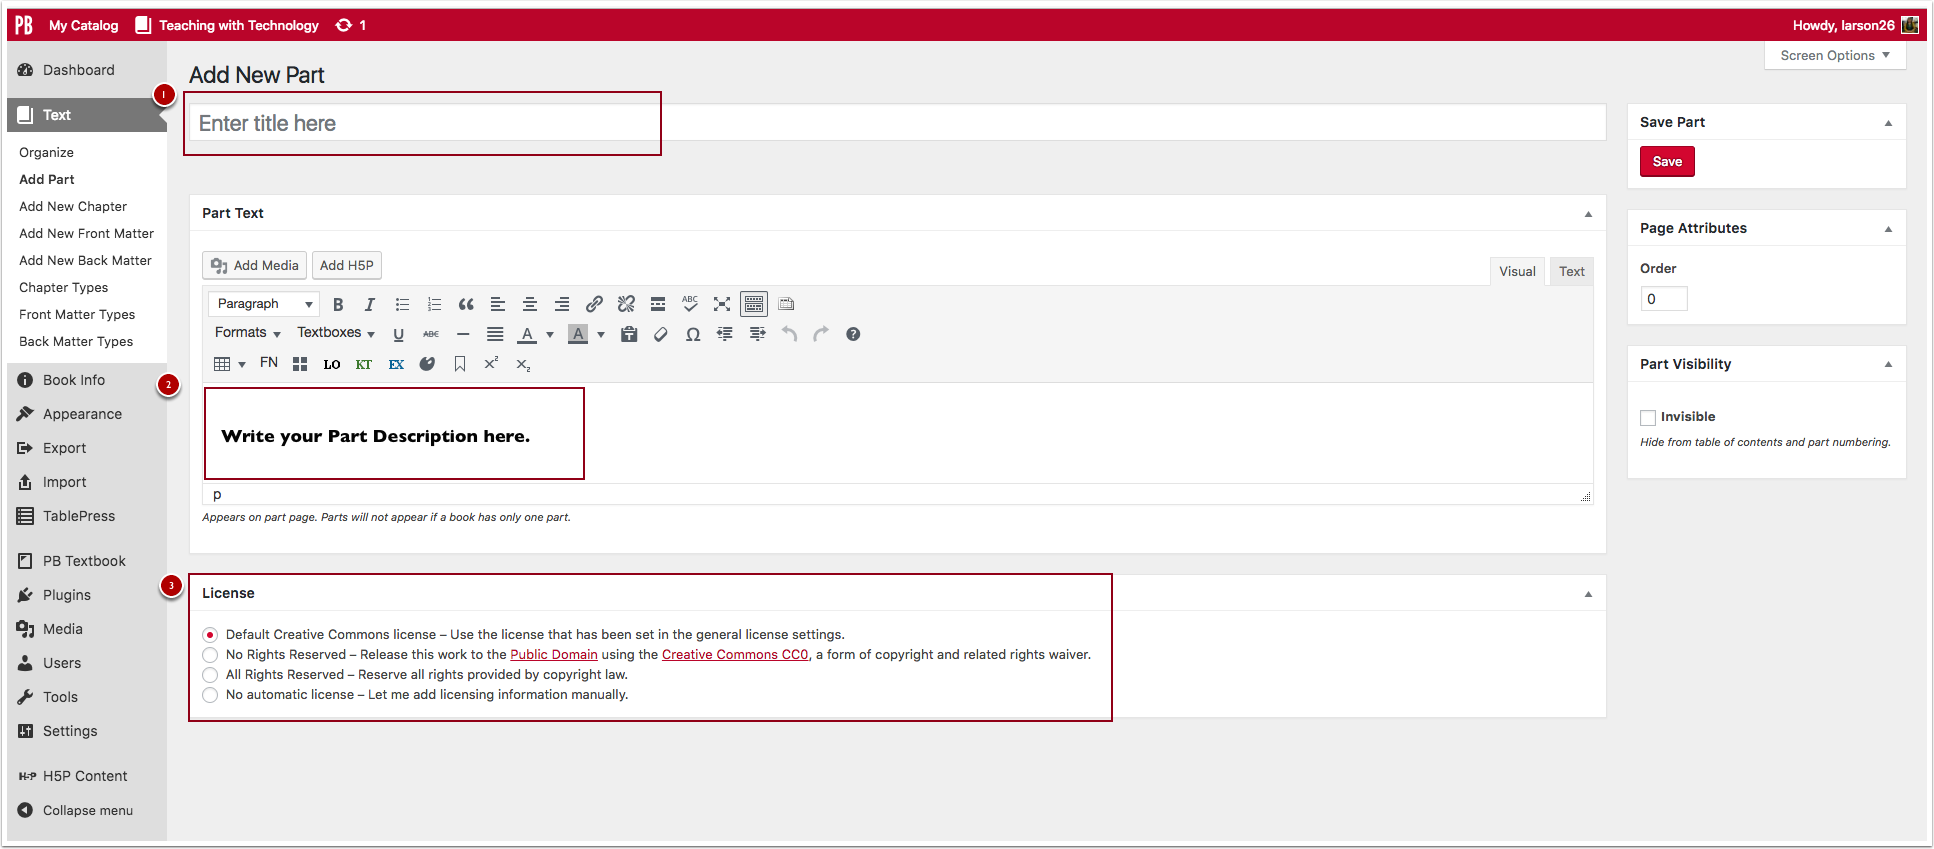
For a Part, it creates a new Part within your book and opens to a blank Part editor where you can enter a (1) title for your new Part, (2) text, and (3) licensing level for the Part.
On the right side menu, you’ll find the option to save your Part to your book, as well as the option to make your part hidden from the Table of Contents and Part Numbering by making it invisible.
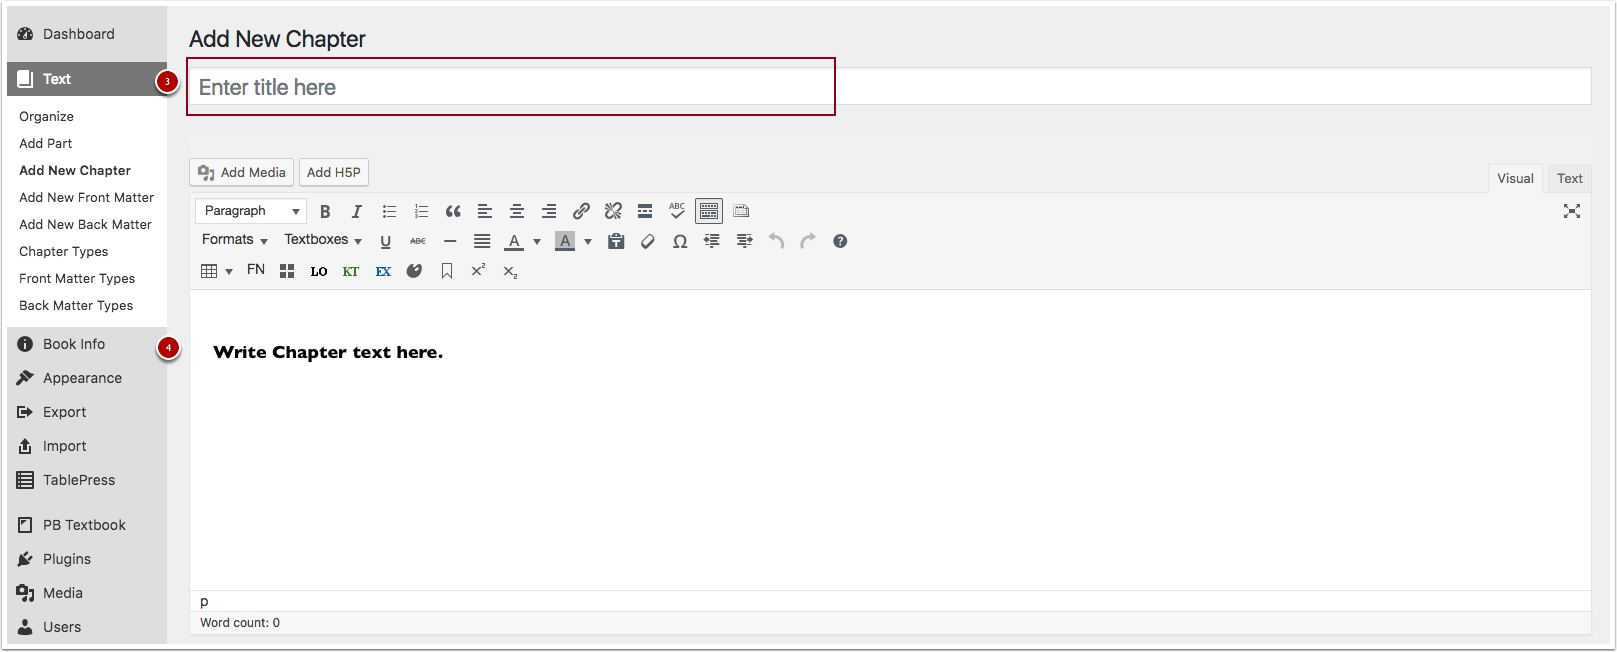
For a Chapter, it creates a new within your book and opens to a blank Chapter editor where you can enter a (1) title for your new Chapter, (2) create the text, (3) set the author, (4) add Chapter metadata, and (5) set the license for the chapter.
On the right side menu, you’ll find options to select what Part your Chapter belongs in, Export Settings, the Publish options, and Chapter Types.
Organizing Chapters
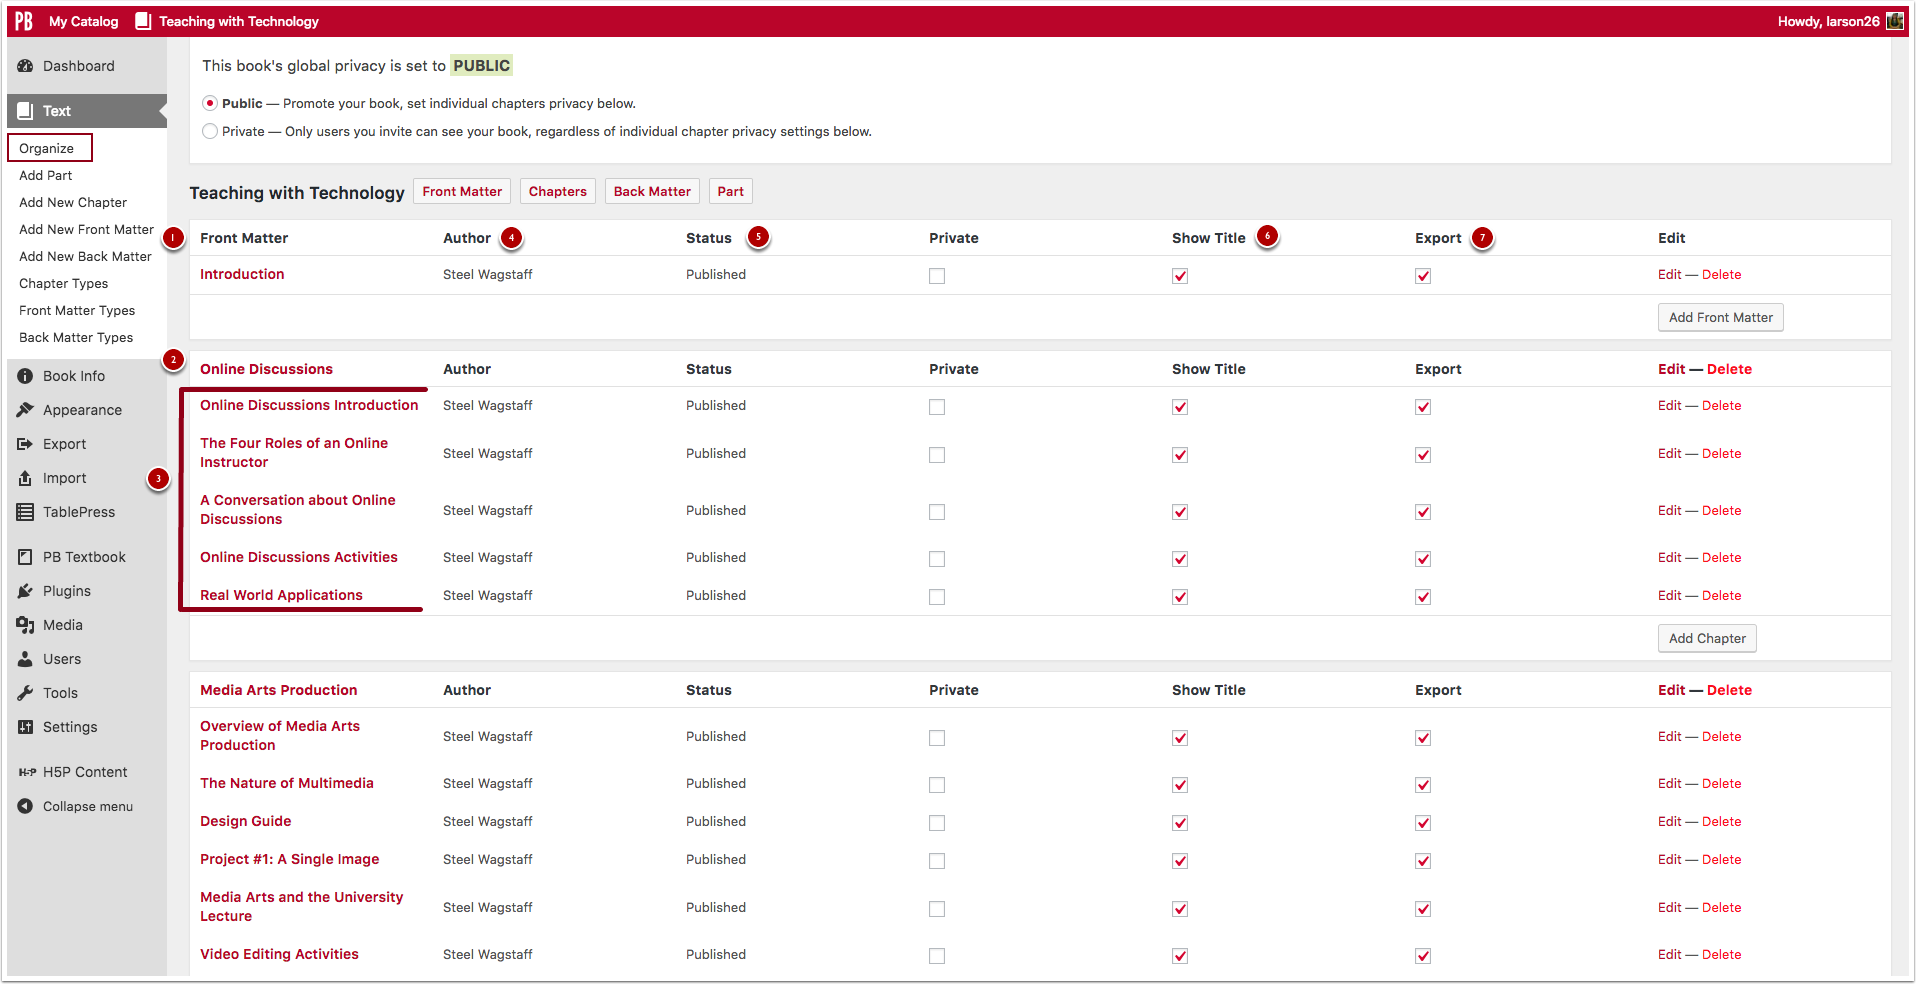
The Text menu also offers you the option to organize your text. Click Organize from the left side menu, and you should see your text laid out like the screenshot below: (1) Front Matter, (2) Part, (3) Chapters, (4) Author, (5) Status – Published or Unpublished, (6) Show Title in the Part or Chapter, and (7) include in Export.
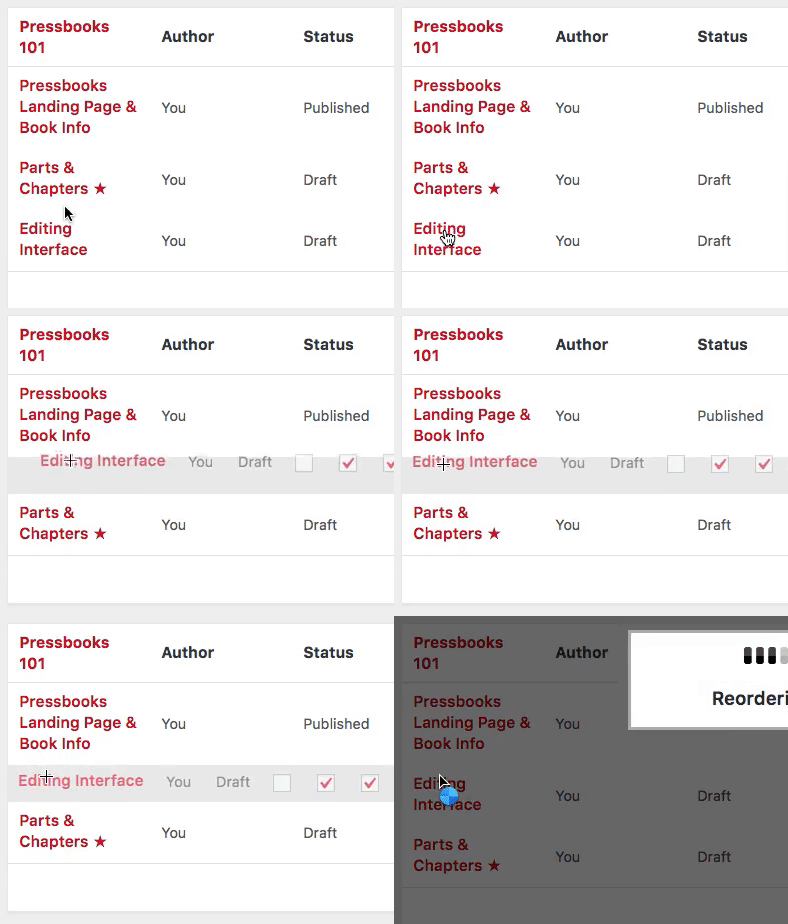
Pressbooks makes it easy to reorganize your book. You can change the position of any chapter by dragging and dropping them into the location you would like them to be. See a short demo below.

