Pressbooks 101
TablePress
TablePress is a free plugin for Pressbooks that allows you to create and manage tables in your book. It provides an interface that allows you to easily edit your table data with no HTML knowledge required. The tables you create in TablePress can contain any kind of data, even formulas! In addition, TablePress offers features like sorting, pagination, filtering, and more for readers.
In this chapter, you'll learn how to:
- Create a Table
- Edit a Table
- Insert a Table into your Chapter
- Export a Table
- Import a Table
Create a Table
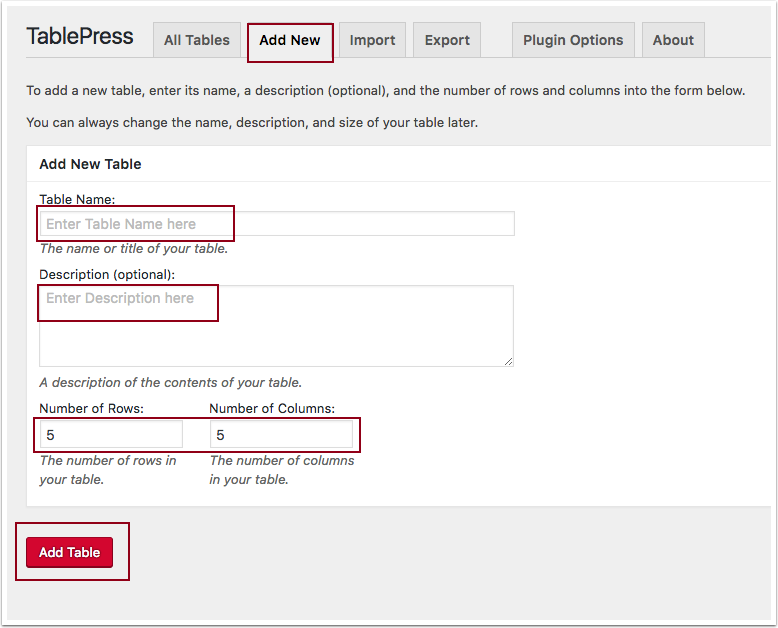
To create a table, select TablePress from the left side menu, then click Add New Table from the TablePress Menu.
This selection will put you on the Add New tab. There you'll see the options to Add New Table. Fill out the Table Name and Description Fields, then select how many rows and columns your table will have. The default is set to five rows and five columns. Then Click Add Table.
Edit a Table
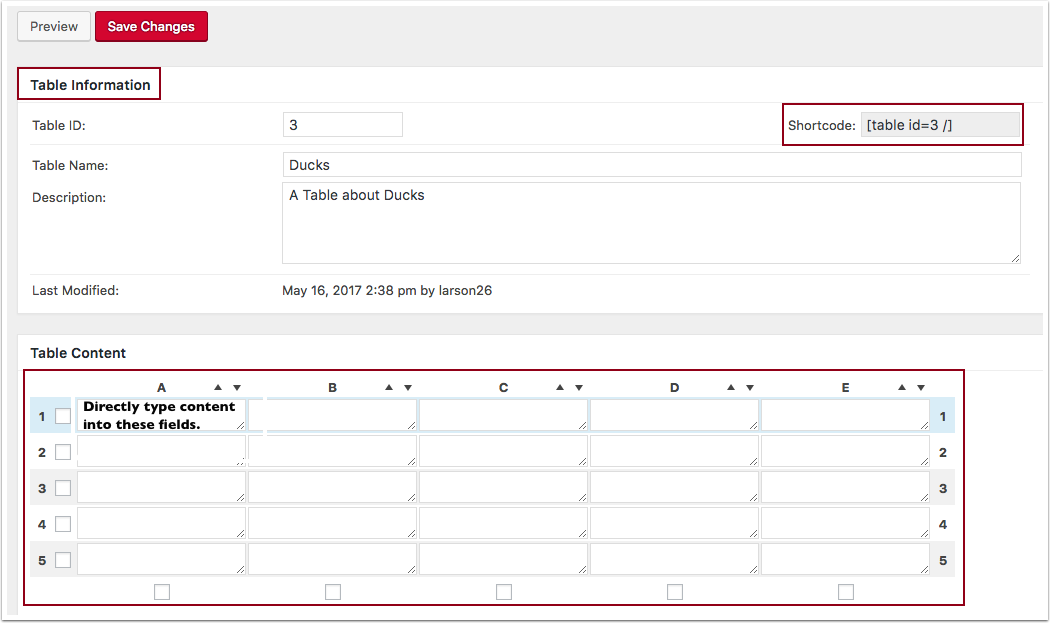
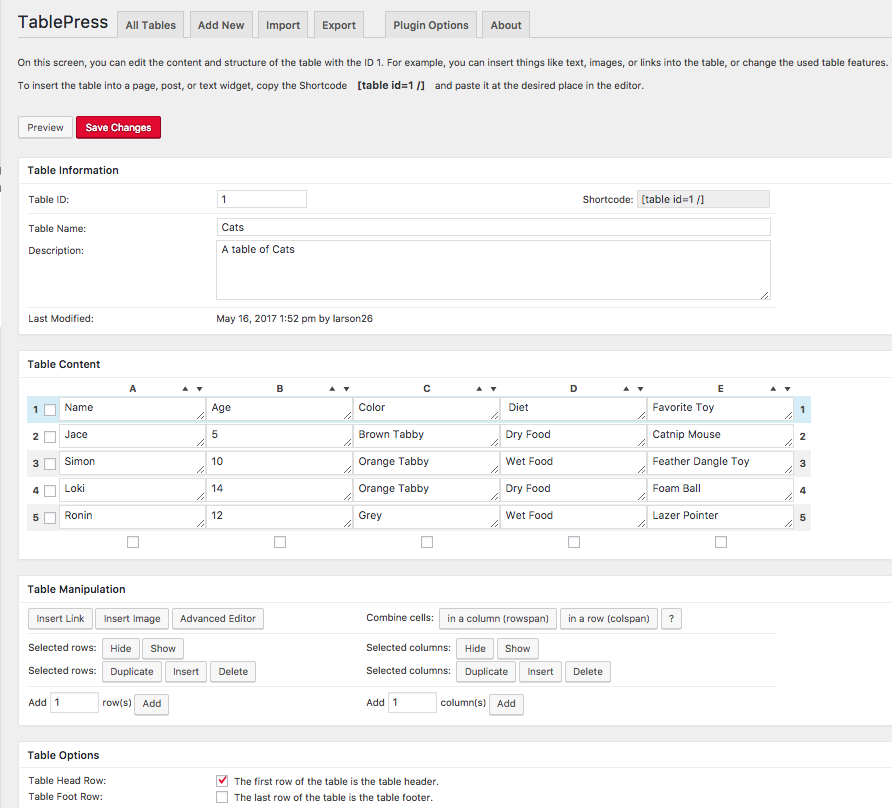
TablePress will take you directly to the Edit Table interface once you've created a table, so that you can customize your table and its behavior in your book. You'll see the information that you entered on the previous Add a Table tab under Table Information and you'll see the Table ID and Shortcode. Beneath that you'll see the actual fields for your table where you will directly type the table content into the fields.
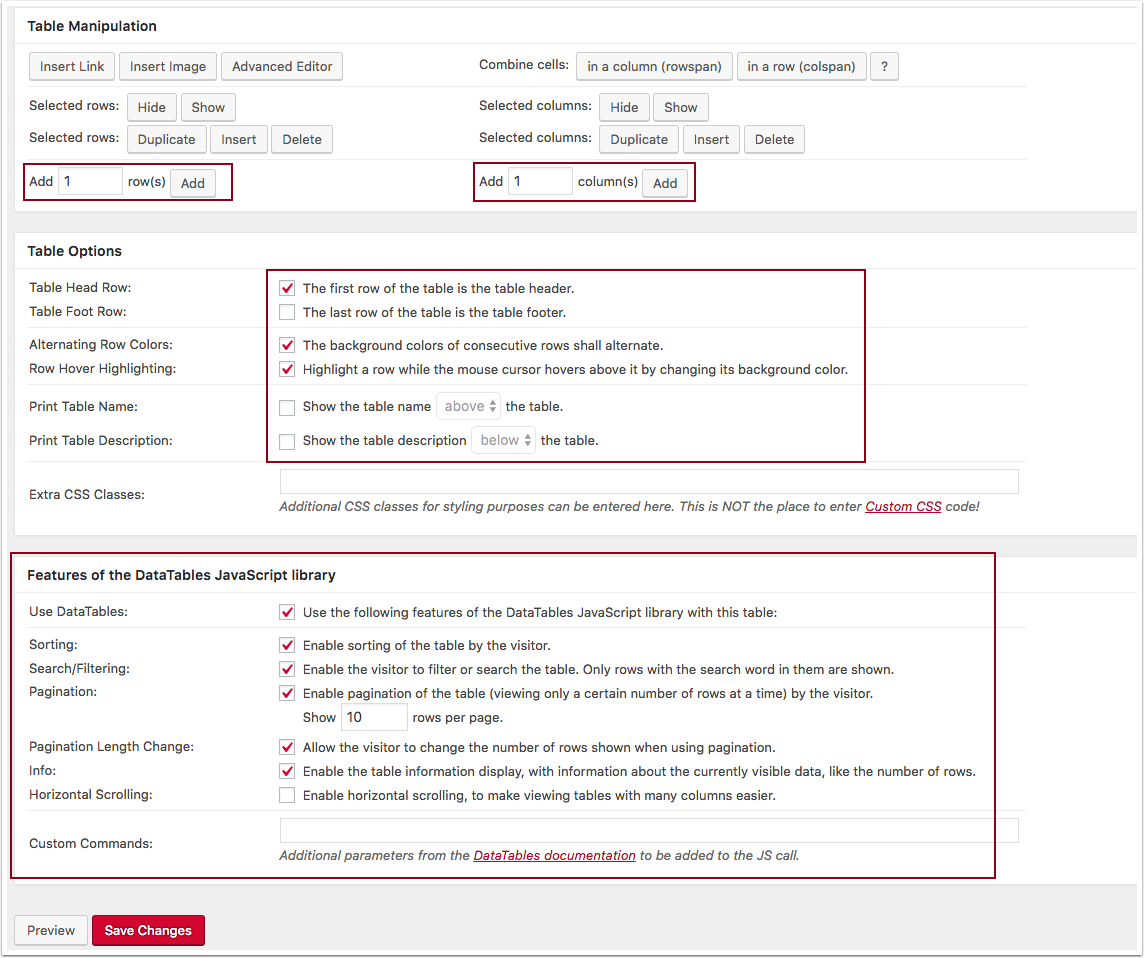
Beneath the Table Content area, you'll find customization options for your table. Under Table Manipulation, you'll find options to Insert a Link, Insert an Image, Advanced Editor, Hide/Show selected rows, Duplicate/Insert/Delete selected rows, Add Rows, Combine Cells, Hide/Show selected columns, Duplicate/Insert/Delete selected columns, and Add Columns.
Beneath the Table Manipulation section, you'll find Table Options where you can customize the look of your tables. You can make the first row the table header, the last row the table footer, alternate background colors, highlight row options, and whether or not the table displays the table name and table description.
Beneath the Table Options section, you'll find the Features of the DataTables JavaScript Query library where you can control the JavaScript customizations of your table like sorting, filtering, pagination, scrolling, and more!
To edit a table you've already made, select TablePress from the left side menu, and choose All Tables. Then mouseover the table you want to edit and an options menu will appear, select Edit.
Insert a Table into your Chapter
To insert a table, you have two options. You can copy the table's Shortcode and paste it into the desired portion of your chapter. The short code looks like this:
![]()
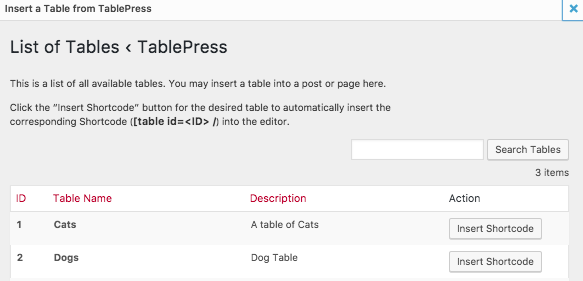
Or you can click the TablePress button on the WYSIWYG editor, identify the table you want to include in your chapter, and click the Insert Shortcode button for that table.

Export a Table
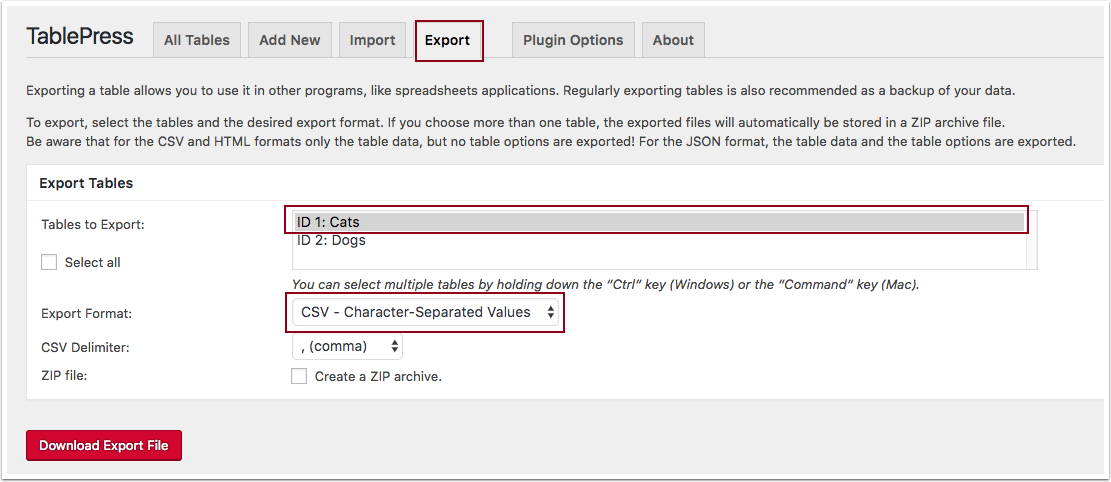
Exporting a table is easy. Click TablePress on the left side menu and select Export a Table. This will take you to the Export tab in TablePress where you can select the table you want to export from the list, or select all if you want to do a bulk export.
Next, then pick the file type you'd like export to, it opens a menu with the following options: CSV, HTML, or JSON, then click Download Export File.
You can also turn the file into a ZIP archive.
Import a Table
Importing a table is valuable, time-saving option whether you want to move a table you've already created or create a table from a existing file.
To import a table, click TablePress on the left side menu, and select Import a Table. You'll see a screen similar to this one:
Click the Choose File button and select the file you'd like to import. You can import a CSV, HTML, JSON, XLS, or XLSX file and turn it into a table in Table Press.
Click the radio button that matches what you want to do: Add as a new table, Replace existing table, or Append rows to existing table, and then click Import.
Example Tables
| Name | Age | Color | Diet | Favorite Toy |
|---|---|---|---|---|
| Jace | 5 | Brown Tabby | Dry Food | Catnip Mouse |
| Simon | 10 | Orange Tabby | Wet Food | Feather Dangle Toy |
| Loki | 14 | Orange Tabby | Dry Food | Foam Ball |
| Ronin | 12 | Grey | Wet Food | Lazer Pointer |
| Name | Age | Color | Food | Favorite Toy |
|---|---|---|---|---|
| Dulcie | 10 | Brown and White | Dry Food | Hedgehog Squeaky Toy |


