Step 1: Navigate to “My Media” in Kaltura
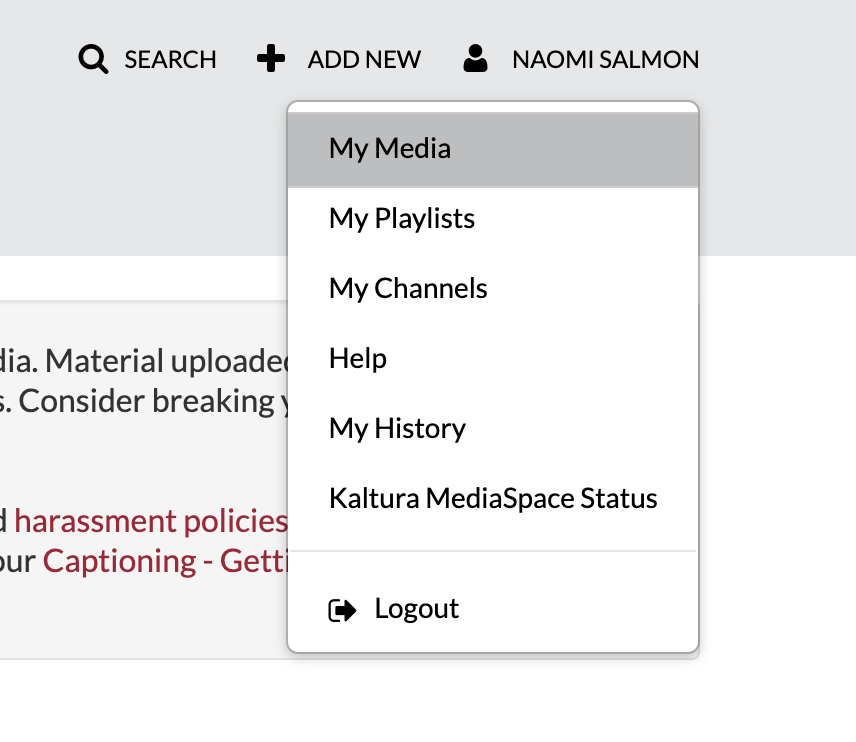
When you log into Kaltura, you’ll see your name in the upper right-hand side of your screen. Click on this and then select “My Media.”
Note: If you’ve already created a quiz and are using this tutorial to learn how to edit settings within that quiz, know that whenever Kaltura creates a quiz, it actually duplicates your video and adds the word “Quiz” to the end of it. In other words, if you’re just trying to edit a previously-created quiz, you’ll want to look for the version of your video that has the word “quiz” included in it rather than the original video you created.
Step 2: Click the pen icon to enter the editing pane
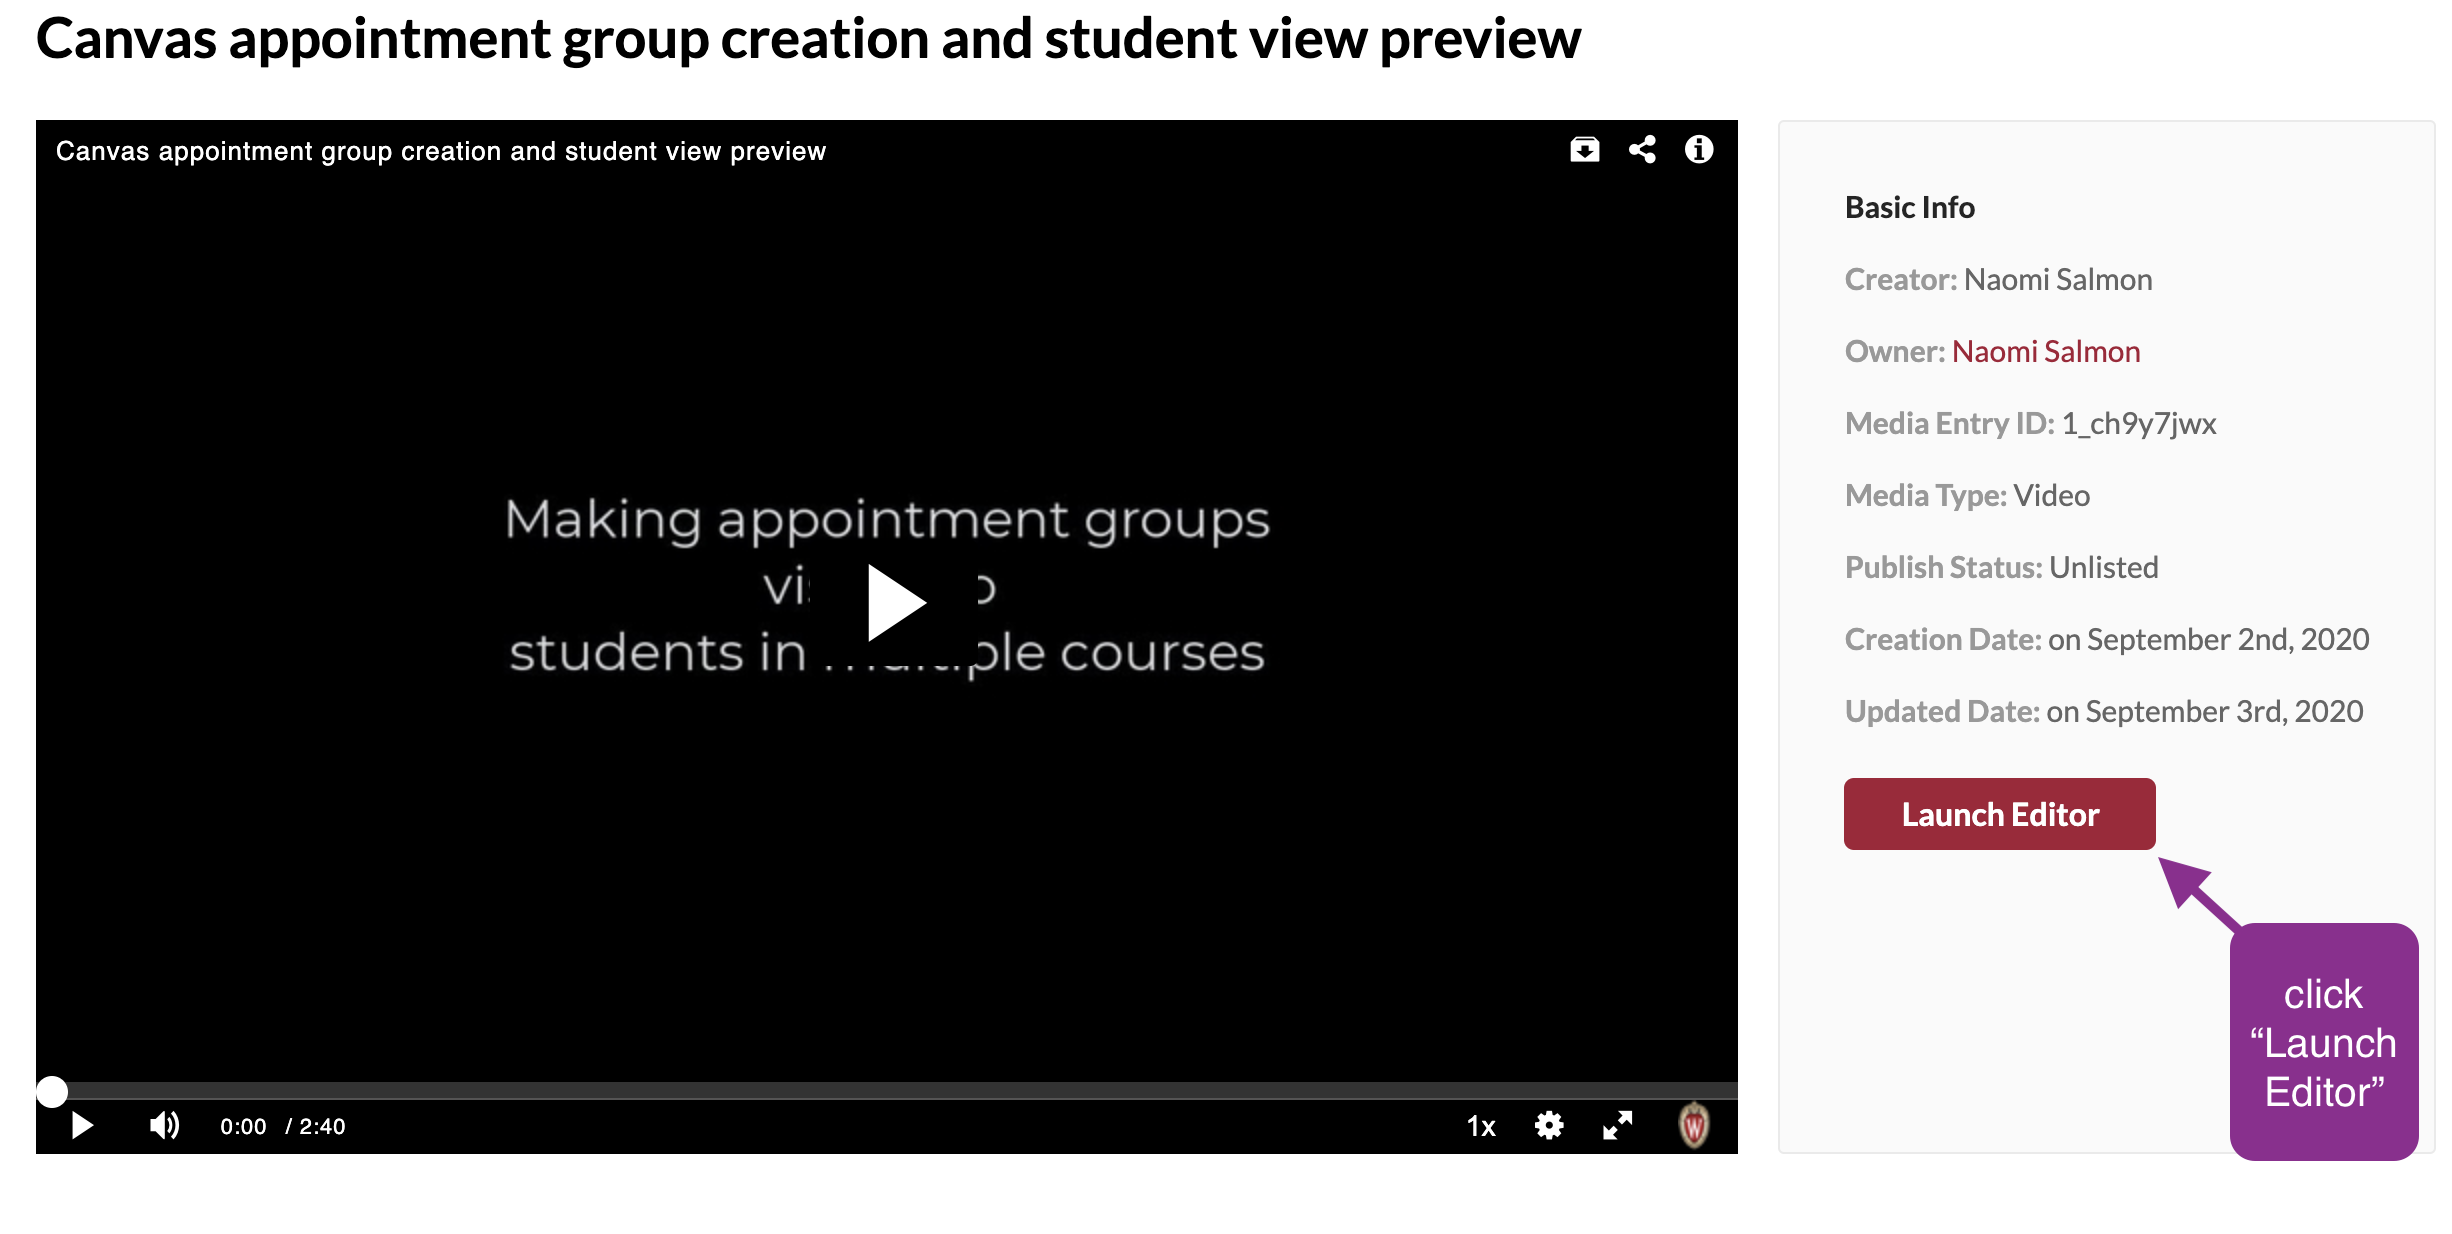
Step 3: Click “Launch Editor” to access quiz settings
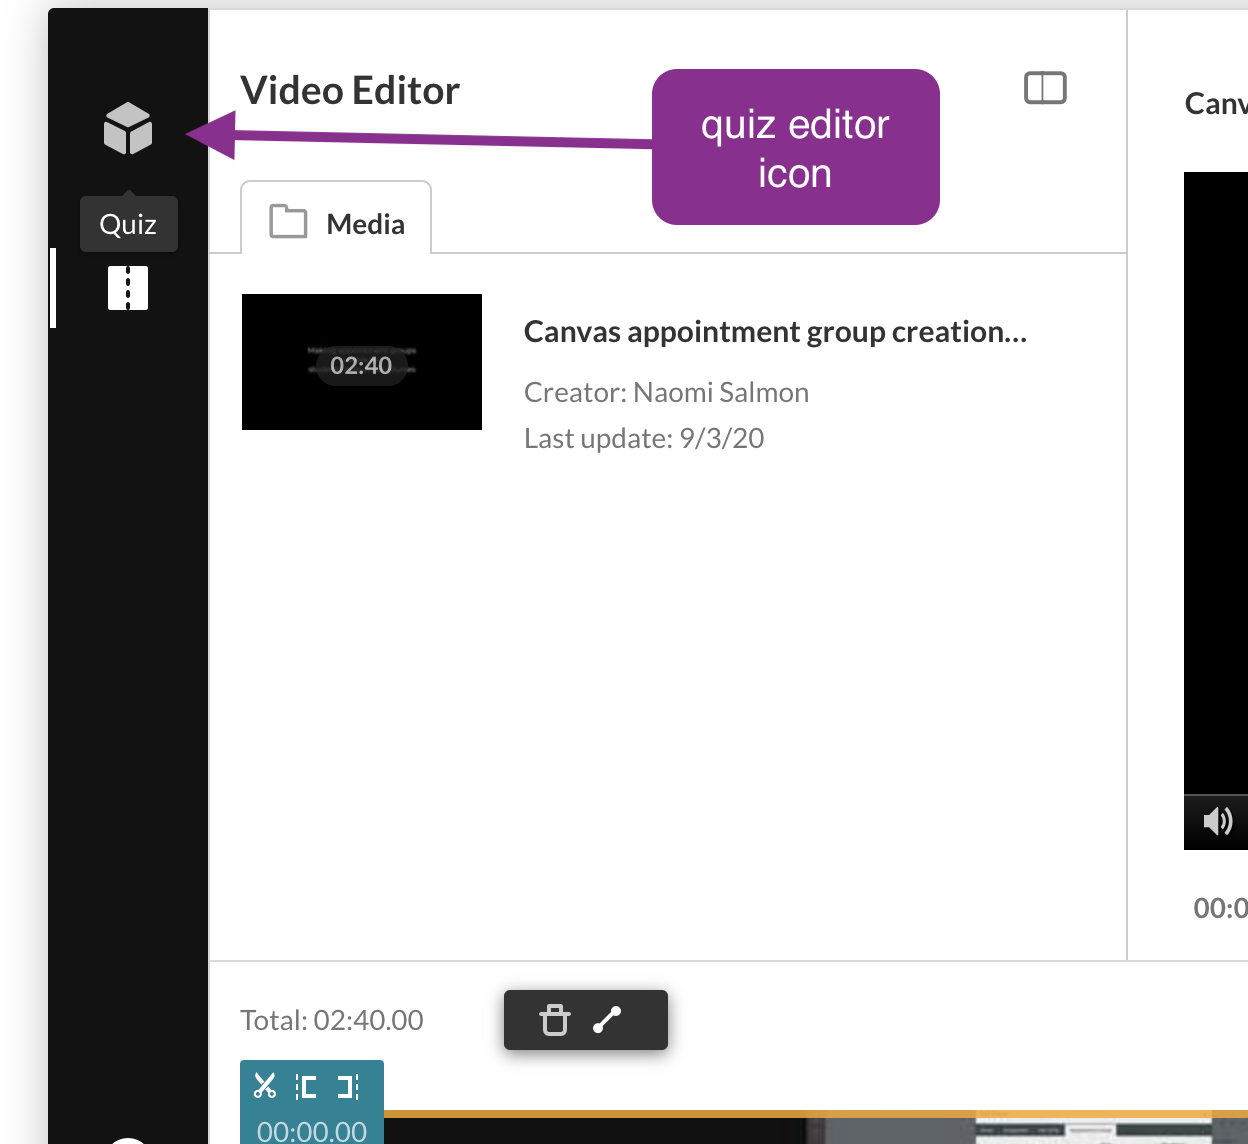
Step 4: Click the Quiz icon in the menu
By default, the editor will show you options to clip portions of your video. What you want is not this video editing screen, but instead the quiz editing screen. To access this, look for the cube icon on the left-hand side of the editor and click on it.
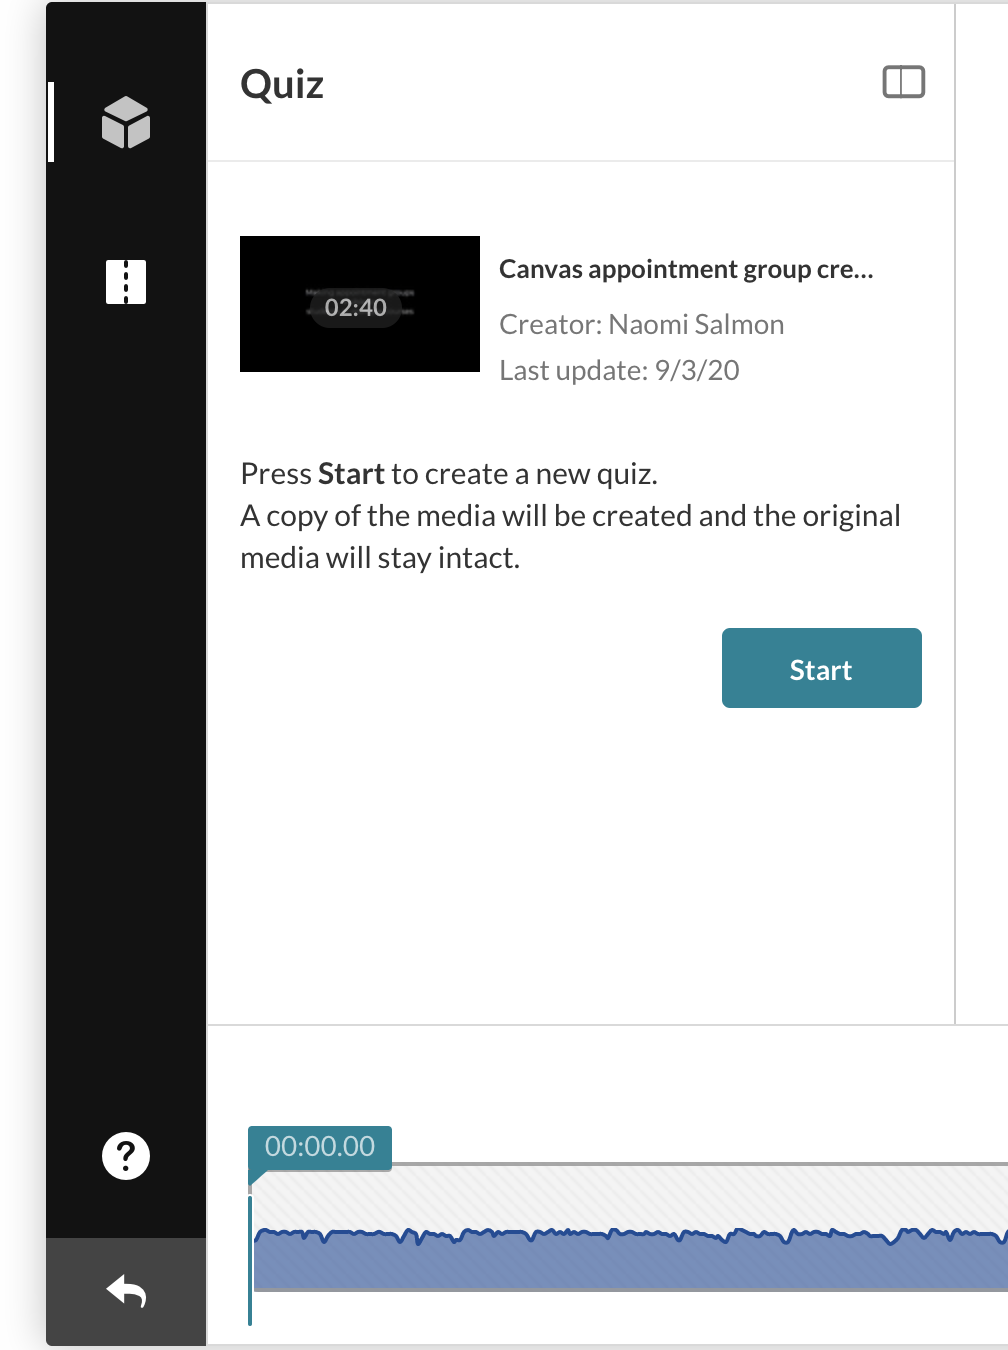
Step 5: Press “Start” to create a new video quiz.
Once you press “Start,” Kaltura will duplicate your media so that you have the original video and a video whose title includes the word “Quiz.” If you go back to edit a quiz you’ve already created, clicking on the cube icon (as decribed in Step 4) will take you directly to the quiz editor rather than prompting you to make a new quiz.
UW-Madison has a KB document that can walk you through creating quiz questions.
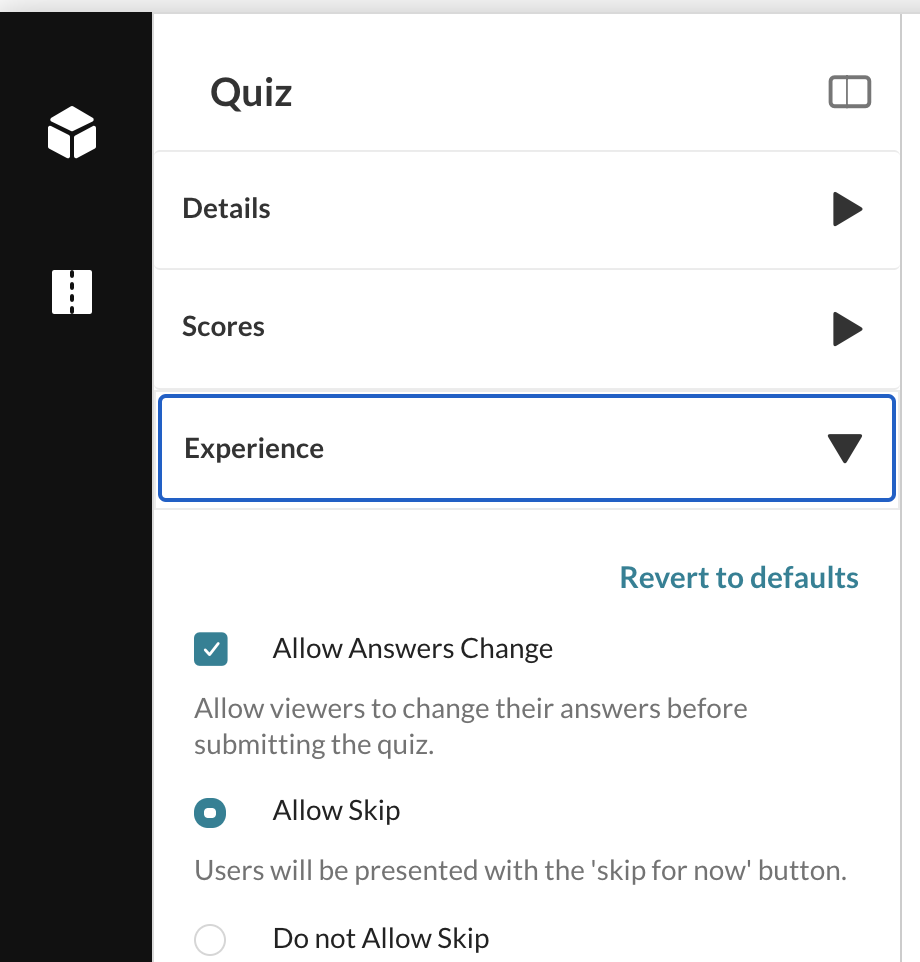
Step 6: Configure settings in the “Experience” menu
The “Experience” dropdown menu will provide you with radio buttons to allow you to allow students to skip or re-answer questions while taking the video quiz.
Additional resources
UW-Madison has KB documentation for instructors working with Kaltura and Canvas together.
- Kaltura – Adding questions to your videos with Kaltura video quizzes
- Kaltura – MediaSpace video editing tools (UW-Madison)
- Canvas – Adding a Kaltura video quiz as a Canvas course assignment
- Canvas – Options to upload and share video in Canvas with Kaltura MediaSpace
- Kaltura – Accessing video quiz analytics in Kaltura MediaSpace and deleting a student’s quiz score.

