
Lab 2: BACKGROUND
As discussed in lecture, PCR can be used to amplify segments of DNA – in this case the HCAII gene and pETblue2 vector – using small pieces of ssDNA called primers. PCR is a very powerful and widely used technique in biochemistry and many other fields because it enables specific amplification of a desired segment of DNA. PCR also enables you to introduce mutations and/or additional sequences into the DNA.
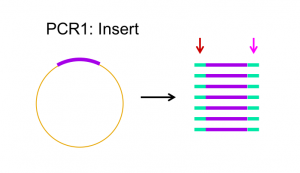
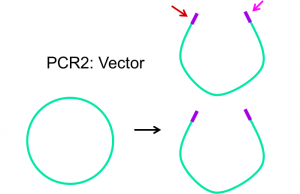
Primers are designed to complement the 3′ end of each strand of the DNA template. For Gibson assembly, primers are designed to be complementary to both the vector and insert sequence, with addition of appropriate overlap sequence (see figures 2.1 and 2.2 below). Once the primers have been designed, they can be ordered from a company that chemically synthesizes them.
Phusion polymerase is a DNA polymerase that is resistant to heat inactivation, making it able to withstand the temperatures necessary to melt/denature the DNA template for PCR.
In a typical PCR reaction there are 3 steps in each cycle:
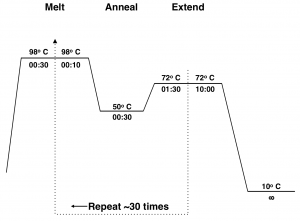
- Denature the dsDNA (double-stranded DNA) template at 94–96 ºC. (This temperature will depend on the number and type of base pairs in your template).
- Anneal the primers to the template at 50–65 ºC (This temperature will depend on the melting temperature (Tm) of your primers).
- Extend the primers at 72 ºC.
Typically this 3-step cycle is repeated 25-35 times. A final extension step of ~20 min. at 72 ºC is done to ensure that all of the PCR products are full synthesized. The thermocycler is then set to hold at 4 ºC or 10 ºC until the reaction is removed from the machine.
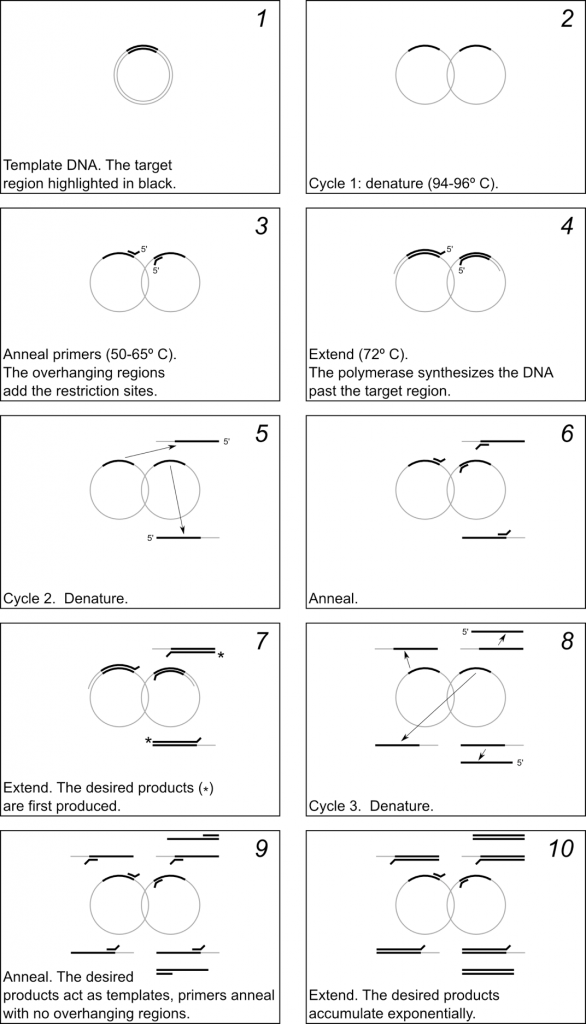
The mechanism of PCR is schematically illustrated in Fig 2.3. Figure 2.4 shows a diagram of the thermocycler program you will use in this lab period.
Lab 2 Goals:
Learn how to locate vector/insert sequences and how to design Gibson cloning primers
Amplify HCAII insert and pETblue2 vector using primers designed for Gibson cloning
Run three PCRs:
- Amplify pETblue2 vector
- Amplify HCAII insert
- Negative control
