
Lab 6: PROCEDURE
You will be growing E. coli cultures and collecting samples for two different experiments at the same time:
1) a growth curve to determine the effect IPTG has on cell growth, and
2) SDS-PAGE to look at the amount of protein produced at the various time points (Lab 8)
There will be 2 different growth conditions for wild type: untreated and IPTG-treated. These conditions will be used for both of the experiments described above so you will be taking multiple samples at multiple time points. It is essential that you label everything and stay organized today!
Prepare experimental cultures
- Each group will be given ~100 mL of an E. coli culture expressing wild type HCAII and ~100 mL of an E. coli culture expressing mutant HCAII, each in mid-log phase (OD600 0.6-0.9).
- Each group should use the provided E. coli to set up 2 – 100 mL induced cultures in 250 mL flasks:
- IPTG-treated E. coli + wild type
- IPTG-treated E. coli + mutant
- Use the sterile flasks provided on the back lab bench – DO NOT use the normal flasks in your drawers!

- Remove 1.0 mL from each culture as your 0 time point. Store in labeled 1.5-mL eppendorf tubes, on ice, until you are ready to process them (see below).
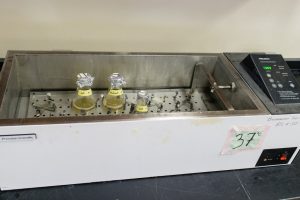
- Add IPTG to a final concentration of 500 μM to each culture, label each flask on its cap (label may comes off if putting on the side of the flask) and then immediately place each flask in a 37ºC water bath.
- There will be several shared cultures of 100 mL uninduced (i.e. no IPTG) E. coli expressing wild type protein. Make a note of which shared culture you are using and be sure to always take samples from the same one (ideally in the same shaker as your induced samples). Remove 1.0 mL of culture as the 0 time point.
Collect experimental samples
You will use the SAME sample for both the growth curve measurement and the gel electrophoresis. After you measure the cell density, you will prepare the sample for electrophoresis.
1) Growth curve
- Remove 1.0 mL samples from each of the three culture flasks at times of 45, 90, and 120 minutes and place in a 1.5 mL eppendorf tube (0 time was taken directly after you prepared the culture, so you already have that). Record the EXACT time point if it differs from those listed (e.g. 48 minutes instead of 45).
- Keep the tubes ON ICE until an OD600 measurement can be made in order to prevent further cell growth. You may measure the OD600 immediately or keep your samples on ice and measure a few time points at once. However, do not wait until the end of lab to measure all of them!
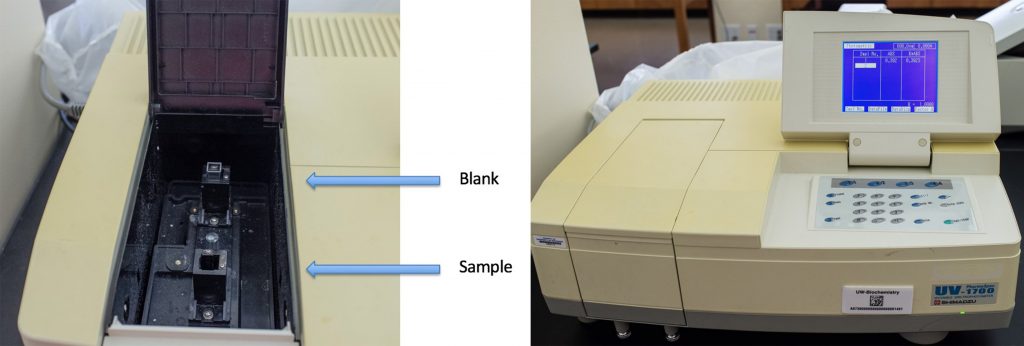
- Instructions for operating the specs can be found in the Appendix: Appendix 5: Operation of the Shimadzu spectrophotometers
- Today we are taking “fixed wavelength measurements”
- Blank by placing empty cuvettes in both the slots and press the Auto Zero button. Wait for the spec to beep (it takes a few seconds).
- Always leave an empty cuvette in the back slot as a blank.
- Re-suspend the cells prior to measuring the absorbance.
- The spec is only reliable between ~0.1 and 1, due to technical limitations. For a sample having an absorbance greater than 1.0, dilute the sample appropriately (with water) so that the absorbance is within the reliable range of the instrument. Record any required dilution factors and absorbance values.
2) Sampling procedure for gel electrophoresis.
- Calculate how much of your sample would be equivalent to 1 mL at an OD600 of 0.5. Preparing your samples this way normalizes them so that all of your SDS-PAGE samples will contain approximately the same number of cells.
- Spin the calculated volume of cells for 1 min at 4,000 rpm.
- Discard the supernatant into bleach. Do not disturb the pellet.
- Resuspend in 30 μL water. Add 10 μL of denaturing sample buffer (containing tracking dye, SDS, and β-mercaptoethanol).
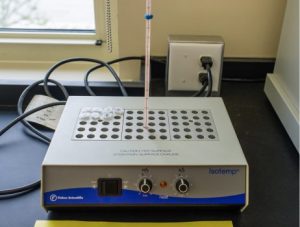
- Heat the samples to 95ºC for 10 min. in the heat block.
- Spin briefly in the microcentrifuge to remove liquid from caps.
- When all of the experimental samples have been prepared, all of the microfuge tubes can be stored in your freezer box at -20ºC until the next period when the SDS-PAGE gel will be performed.
Prepare the remaining culture for purification.
- Once you have collected all of your samples, transfer your remaining wild type and mutant cultures to two separate 250 mL centrifuge bottles – DO NOT combine the wild type and mutant cultures.
- The other group at your pod will add their culture to these bottles as well, so that each pod will have 200 mL of wild type and 200 mL of mutant to spin.
- Be sure your bottles are well-labeled. The pellets (containing protein for purification!) will be frozen in these bottles until next week.
- Balance the two bottles against each other on a scale, using water to adjust if necessary.
- Give the bottles to your TAs who will pellet the cultures for you (by spinning at 6,000 x g for 15 minutes) and freeze the pellets.