
Lab 4: PROCEDURE
Lab Safety Notice
This is the first 551 lab to utilize E. coli cells. Therefore, you must use aseptic technique as necessary during the lab, since you do not want any foreign bacteria (from your body, clothing, or that may already be present in lab) to contaminate your samples. In addition, anything that you use that touches live bacteria (tips, tubes, etc.) must be disposed of in the orange “Biohazard” trash, to avoid release into the environment. Spills should be cleaned up promptly with a sterilizing solution of 10% bleach. (As an additional safety precaution, all of the E. coli strains used in this lab—and in the vast majority of biochemical labs worldwide—are of “K12” strains that are engineered to be non-pathogenic.)
NOTE: Proper aseptic technique (also referred to as “sterile technique”) is a hallmark of all good biochemical researchers. Your TAs and instructors will demonstrate as necessary. In essence, you must take care to be extra aware of your person and any tools that you are working with. If you touch something that is not sterile (be it a fingertip, sleeve, piece of glassware, cough, etc.) to something that is sterile (a jar, or media, or a plate, etc.), then the sterile object is no longer sterile! You should thus either throw it away, or sterilize it again before using it. If you have any doubt about an object’s sterility, treat it as non-sterile.
Assembly Reaction
- Determine how much vector DNA you will add to each reaction. Reaction 1 is the experimental reaction; reaction 2 is a negative control and should contain the lower amount of vector used in reaction 1.
- Check the total volume of your PCR product and make sure that you have enough for both reactions. A few microliters are usually lost on the column. You can check the exact volume you have to work with using a pipette.
- Determine how much insert to add to each assembly reaction. Be mindful that the total amount of DNA falls between 0.05 – 0.5 pmoles.
Example:
Reaction 1: 0.2 pmol vector, 0.2 pmol insert
Reaction 2: 0.1 pmol vector
The following video walks through the calculation process for this experiment:
- Set up your reaction as follows, for a final volume of 20 μL:
| ___ | μL Vector DNA |
| ___ | μL Insert (or control) DNA |
| 10 | μL Gibson Assembly Master Mix |
| ___ | μL H20 (use the week 1 water in your freezer box) |
See Appendix for the Gibson Assembly Master Mix recipe (link opens in a new tab): Appendix 4: Buffer formulations
- Incubate the reactions in the thermocycler at 50 °C for 30 minutes.
- Place on ice for a few minutes to cool.
Transformation of E. coli with the assembled DNA
- Thaw an aliquot of E. coli cells on ice.
- For this lab we are using a strain of E. coli called DH5α. While the cells are thawing, chill one empty 1.5 mL eppendorf tube on ice. You should receive a 200 μL tube. Gently pipette 100 μL of DH5α competent cells into the empty tube; use one tube for each reaction.

- Add 10 μL of Gibson assembly reaction to the DH5α cells. Do not pipette up and down to mix! You can mix by gently flicking the tube.
- Incubate for 15 minutes on ice.
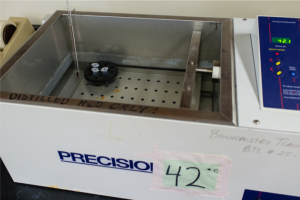
- Heat shock for 30 seconds at 42°C. Do not exceed 30 seconds.
- Place on ice for 2 minutes. Do not exceed 2 minutes.
- Transfer your tubes from ice to a rack at room temperature. Add 500 μL SOC (a very rich media). Do not put back on ice once you add the SOC.
- Shake for 30 min. at 37°C in a shaking incubator.
- Spin the transformed E. coli at 4,000 rpm for 1 min. Remove and discard 300 μL of the supernatant. Gently resuspend the pellet in the remaining supernatant.
- Spread the total volume of each transformed E. coli reaction on LB-ampicillin-Xgal plates. Be sure you label your plates with the reaction number, your name and your section. It is best to label the plates around the edge so the writing does not obscure the colonies on the plate.
- Incubate the plates at 37°C overnight.