
Lab 1: Course Introduction | Introduction to Anatomy
Learning Objectives:
- Explain how the course is set up and where to find important information about the course.
- Describe anatomical position and properly use directional terminology with respect to that position.
- Associate how the basic principles of common radiological methods are used clinically.
- Interpret how cross-sectional anatomy relates to 3D anatomy.
- Explain the function of various bony markings.
Terms to Know
|
Positions and Planes
Axes of Rotation
Terms of Motion
Terms of Direction
Radiology Terms
|
Bone markings
|
Introduction
Welcome to Anatomy & Physiology 338: Human Anatomy Laboratory! Today we will begin with an introduction to this human anatomy lab course. We will discuss the logistics of the course, and you can ask any questions you might have. We also ask that you review the course Canvas website for additional details about the course. We put great effort into providing you with all of the information you need in a user-friendly way on the website. In the future, we ask that you look at the website before emailing questions to TAs or Professors.
After the introduction to the course, we will view a presentation on radiology methods. Following that exercise, we will break up into groups and go through four stations: a review planes of motion, movement, axes, and directional terminology; an introduction to cross-sectional principles; an introduction to the Navigator; and an introduction to bones and bony markings.
Radiology Presentation
 The most common way you will interact with anatomy in the clinic is through surface anatomy. Surface anatomy is the anatomy that we can see from the surface of the body. For example, if you look at your knee, you can see where the patella (or kneecap) is. We will explore surface anatomy throughout the course. Palpation is the part of a medical examination in which the clinician uses their hands to touch or feel the anatomy. For example, if you touch your patella and feel its anatomy, you are palpating the surface anatomy of that structure. We will also explore anatomy through palpation.
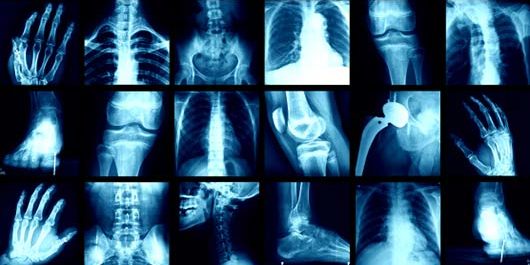
Another common way you will interact with anatomy in the clinical setting is through radiological imaging. Your TAs will give a presentation describing the different types of radiological images that you may see in the clinic. The key take-aways that you should get from the presentation are in the questions below. A PDF copy of the questions can be found in the worksheet posted on the Lab 1 Canvas page.
Lab Activity 1: Anatomical terminology, planes, motion, and axes
For this activity, you will work in small groups to answer anatomical terminology, planes, and motion questions. You can find the questions in the worksheet posted on Canvas and in the interactive modules below.
Anatomical Terminology
Anatomical terminology is the language used to describe the structures and functions of the human body. It is also the language used in medicine. You can use the Glossary of Anatomical Terms to learn these terms. This document is also posted on the course Canvas page. You are not required to know all terms and word parts in the glossary, though they may be helpful to reference when you are learning new terms. You are expected to know the terms of direction on the second page of the glossary and all terms listed at the beginning of this lab guide.
Anatomical Planes and Motions
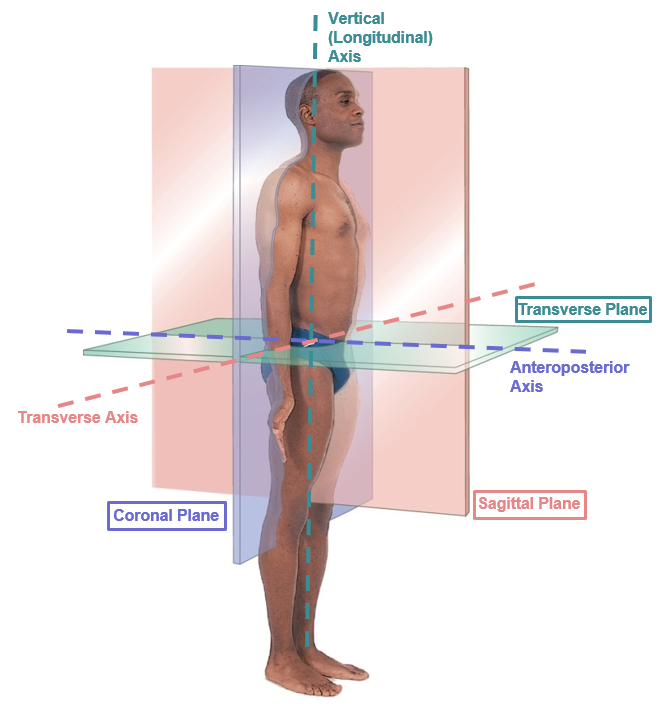
Our muscles produce movements at our joints. Those movements occur around axes and within planes of motion. Specific movements usually only occur within certain planes. The planes of motion and their associated axes and movements are described in the table below.
|
Plane |
Axis |
Description |
|
Sagittal |
Transverse |
Bisects the body from front to back, dividing it into left and right portions. Flexion and Extension movements usually occur in this plane. |
|
Coronal / Frontal |
Anterior-posterior |
Bisects the body laterally from side to side, dividing it into front and back portions. Abduction and Adduction movements occur in this plane. |
|
Transverse / Horizontal |
Vertical |
Divides the body horizontally into superior and inferior portions. Rotational movements usually occur in this plane. |
Completing the movements yourself can be a great way to learn motions. With a classmate, actively complete the following motions and identify the associated plane.
 Elbow flexion and extension
- Ankle dorsiflexion and plantar flexion
- Abduction and adduction of the hip
- Abduction and adduction of the shoulder
- Horizontal abduction and adduction of the shoulder (raise your arm to the side and reach across your body)
- Trunk rotation
- Lateral bending of the trunk (bend to the side)
- Internal and external rotation of the glenohumeral joint (shoulder)
- Cervical (neck) rotation to the right
- Flexion of the trunk
- Extension of the cervical spine
- Flexion and extension of the knee
- Hip extension
Work with a partner to answer the questions in the following activities and/or the worksheet (posted here and on Canvas). Some of the questions in the activities and worksheet overlap, while some differ. You are encouraged to use both resources as practice when learning these anatomical terms.
For more practice, work with a partner to complete the following table (also in the worksheet).
|
Exercise |
Joint |
Movement |
Plane |
Axes |
|
Squat / Standing up from a chair |
Knee |
|
|
|
|
Hip |
|
|
|
|
|
Push-up |
Elbow |
|
|
|
|
Shoulder |
|
|
|
|
|
Jumping Jack (moving your arm over head and your feet outwards) |
Hip |
|
|
|
|
Shoulder |
|
|
|
|
Lab Activity 2: Cross-Sections
In this activity, you will work through a PowerPoint on the computers in the lab. You will view cross-sectional images of objects, and you will be asked to guess what the objects are. You will be prompted to think about a few questions as you go through the activity.
Lab Activity 3: Bony Markings
Review the bony markings in the activity below before working through the activities and markings exercises. You do not need to know the names of specific markings on specific bones at this time (e.g. lesser trochanter, deltoid tuberosity). For now, you should understand the general names for different bony markings and the purpose of each marking (e.g., attachment site, passageway, space a structure runs through). Understanding the terminology and purpose of these bony markings, in general, will help you when you learn specific bony markings later in the course.
Look at the bones on display and note the areas marked with a star or an arrow. The markings at these stations will match up with the letters indicated below. Complete the following questions below. A PDF copy of the questions can be found in the worksheet posted on the Lab 1 Canvas page.
When reviewing bony markings, ask yourself:
- Why might these areas exist on bones? Specifically, why are there holes within the skull?
- Why are there locations on long bones that are rough, smooth, protruding, grooved, or depressed?
Bony markings on the humerus:
A. This is a tubercle (greater tubercle). What is the purpose of this protrusion?
B. This is a groove (bicipital groove). What is the purpose of this groove?
C. This is an epicondyle (medial epicondyle). What is the purpose of this protrusion?
Bony markings on the scapula:
A. This is a fossa (supraspinous fossa). What is the purpose of this area?
B. This is a spine (scapular spine). What is the purpose of this area?
C. This is a process (Coracoid process). What is the purpose of this projection?
Bony markings on the skull:
A. This is a foramen (Foramen Magnum). Why are there holes like this in the skull?
Bony markings on the femur:
A. This is a trochanter (Greater trochanter). What is the purpose of this structure?
B. This is the head of a bone (Femoral head). Why does it have a smooth surface?
C. This is a condyle (Medial condyle). Why does it have a smooth surface?
Lab Activity 4: The Navigator
In this activity, students will learn how to use the Anatomage Navigator. This tool includes a 3D printed model, a digital rendering of the model, and cross-sectional images of the human cadaver that the model was created from. The tool allows you to see the different levels of the body in cross-section. Layers and structures can be added or removed in the digital model so that you can examine specific structures.
- The TAs or PLAs will lead you through a demonstration of how to use the navigator.
- When working on your own, you can use the “Using the Navigator” instructions next to the computer to practice using the Navigator for reference. Be sure to practice using every tool on the instructions sheet. For now, you will be using the torso model. There is also a head and neck model that we will use later in class.
- We will begin using the Navigator to explore specific structures in the lab starting in Lab 2. It is important to use this lab activity to familiarize yourself with the tool to get the most out of the tool in the upcoming labs. While the computer interface technology is not as intuitive as we would like it to be, the tool itself is incredibly valuable. One of the most challenging skills to attain in anatomy (and medicine) is understanding how the 3D anatomy you view in the lab relates to the 2D image you will see in radiology and cross-sections. The Navigator is an excellent tool for helping you gain that skill.
