The Annotation Layer: A How-To Guide
The Basics
When you see a section of this text highlighted in yellow, it means that someone has added an annotation to that line.
For example, this note should appear highlighted in yellow. Try clicking on it!
When you click on a yellow highlight, you will see a toolbar appear on the right-hand side of your screen. (You may need to wait a few seconds for this to render.)
You can change the width of this annotation pane by clicking and dragging the sidebar.
Click here to see an animated example.
Once the annotation toolbar is expanded, clicking outside of the toolbar–for instance, in the space on the left-hand side of your screen–should hide the annotation toolbar once more.
If you find the yellow annotation highlights distracting, you can also click on the eye icon at the top right-hand side of your screen to hide them from view.

Viewing Course Comments and Adding Your Own
Public Annotation Layers
This text contains two different public Hypothes.is annotation layers. The first is the published UW-Madison Pressbooks publisher layer, which is what you should see by default on this and many other pages in this project.
I use this layer to post supplemental material that may be primarily of use to readers accessing the web version of the text.
The Public annotation layer is a space where you can contribute thoughts of your own. It’s also a space where you can take part in some of the guided engagement activities in this text.
You’ll Need to Toggle Between Layers to View The Public Annotation Space
Joining In
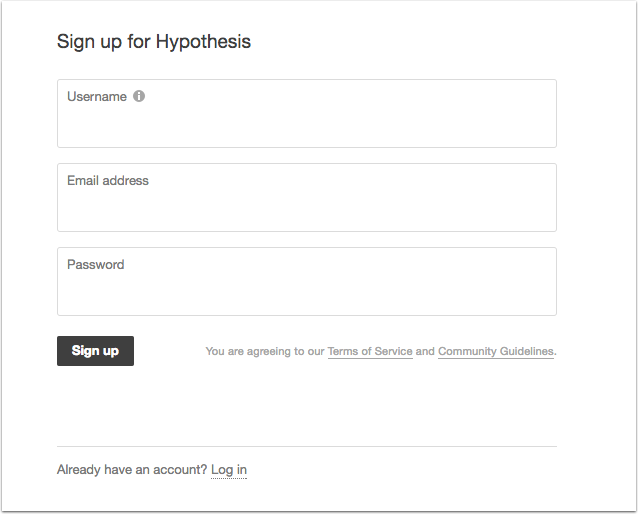
You don’t need to be registered to view others’ annotations, but to add your own comments to the layer, you’ll need to register for a Hypoothes.is account. To do so, you’ll need to provide a username, email address, and password and then click the Sign Up button. After that, you should receive a confirmation email with a link to click to validate your account. If you don’t see this email, check your Spam or Junk folder.
Annotation
The How to Get Started box is displayed the first time you log into your Hypothes.is account. It offers explanations of the different button functions and briefly outlines how to use them.
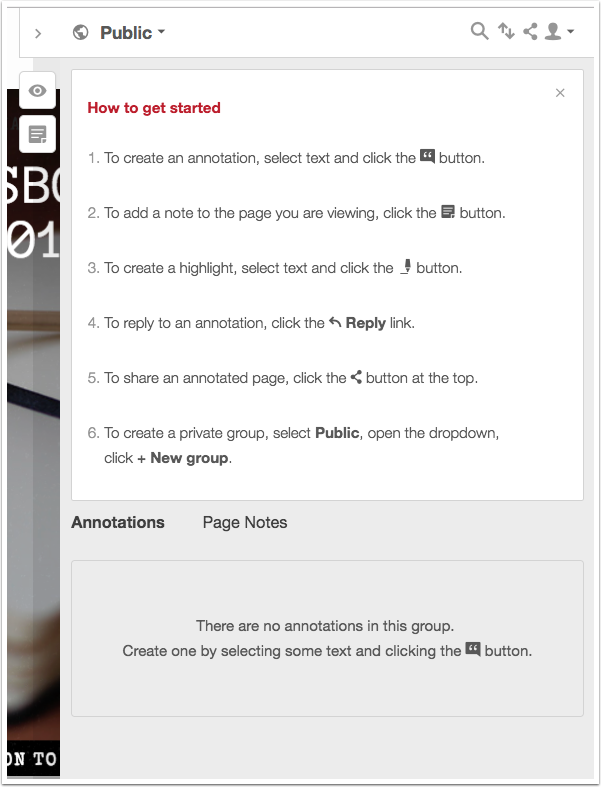
To create an annotation or highlight, start by selecting the text and then choose either annotate or highlight. Choosing annotation will open the annotation pane to a new blank annotation field. Selecting highlight will highlight the text you have selected.

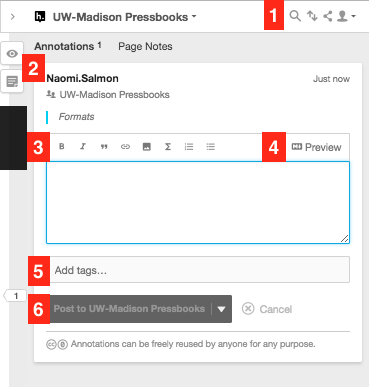
Annotation Pane Tour
- Filter, Sort, Share, and Account buttons
- Turn on/off highlights, create annotation buttons
- Text editor formatting tools – bold, italic, quotation, link, media, LaTex, numbered list, bulleted list,
- Preview annotation
- Tags Field – add multiple tags separated by commas
- Post button – you can use the drop-down button to easily switch between Public, Private, and Group posting
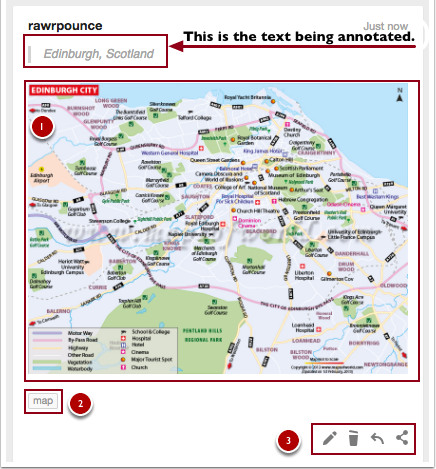
Once you’ve created an annotation, it will appear in the annotation pane on the right side of the page. It features the text that you’ve selected to annotate at the top, your annotation text, and any tags you have added.
In the screenshot below, you’ll see an annotation (1). In this case, I’ve provided a map of Edinburgh, Scotland to show other users what the city’s layout looks like. Item (2) illustrates what tags look like when you use them on an annotation, and item (3) displays the edit, delete, reply, and share buttons.