Part 3: Activities
Planning and Building Online Discussions
Using the Discussion Tool:
Whatever your method of teaching – online, face-to-face or blended – the discussion board can encourage deeper engagement with course materials, provide timely answers to questions, help foster a community of learning, and tie together online and face-to-face components of your course.
In an online course the discussion tool provides a space for your students to build a sense of community. You and students can interact through formal discussion prompts and informal Q & A forums. In a blended or a face-to-face course, you can use student responses posted to the discussion board in the classroom to stimulate student interaction and tie both components of the course together.
Remember, no matter how you use the Discussion tool, make certain to clearly communicate its purpose(s) to your students, as well as any expectations. This will help improve student investment in the discussion itself.
Building a Discussion
After you have thought about how you plan on using the Discussion tool, you need to actually create the activity. The Discussion tool is comprised of three parts: Forums, Topics, and Threads. A “Forum” is an organizational container and can contain one or more “Topic.” Each Topic fits within a forum, and a string of replies to a topic are known as a “Thread.” Only instructors can create Forums and Topics, students can reply and create “Threads.”
How to Create a Discussion Forum
To build a new discussion forum, follow these steps:
Step 1:
Click on Communication in the navigation bar, and select Discussion.
Step 2:
On the Discussion page, click the New button, and select Forum from the drop-down menu.

Step 3:
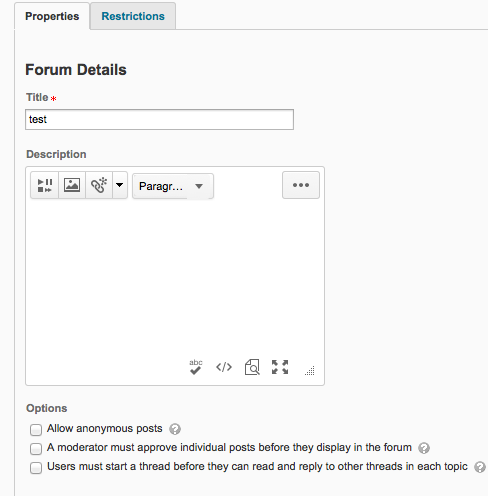
Enter the desired information and availability settings.

The first of the two options available below the description box are self-explanatory. However, option three (users must start a thread before they can read and reply. . .) warrants special consideration. Selecting this option can ensure students do not simply restate what others have said, but come up with a response that is original.

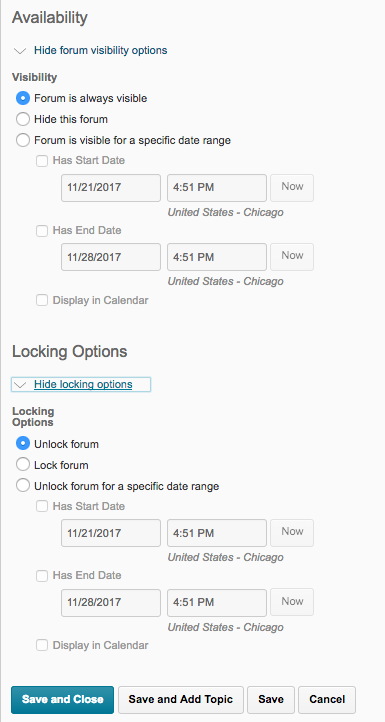
Note that you can hide or lock the Forum either manually or automatically according to a specific date and time.
Hiding the Forum will not allow students to see the Forum or post to the Forum. If you simply lock the Forum, students can still click on Topics and Threads already posted, but cannot make any new posts.
Step 4:
Click Save and Close, or if you already have a topic ready, click Save and Add Topic.e
Important: You must add a Topic to a Forum in order for any Forum to be functional. Students are unable to see or post to a Forum without a Topic.
Create a New Topic
Step 1:
If you clicked on Save and Add Topic you are now on the New Topic page. If not, click on the small triangle next to the forum in which you would like to add a Topic. Then click Add Topic.
Enter the topic title and description. It will automatically be placed in your newly-created forum.
You will also note that Topics have the same settings as Forums, you can also allow anonymous posting, preview student posts, hide and lock topics just as you can Forums. Remember that whatever your settings are at the Forum level will affect the Topic. So if you lock the Forum, you will also lock the Topic.
Step 2:
Click Save and Close to be returned to the Discussion List page.
You can add as many Topics as you want under any one Forum.
Create a New Thread and Add Posts
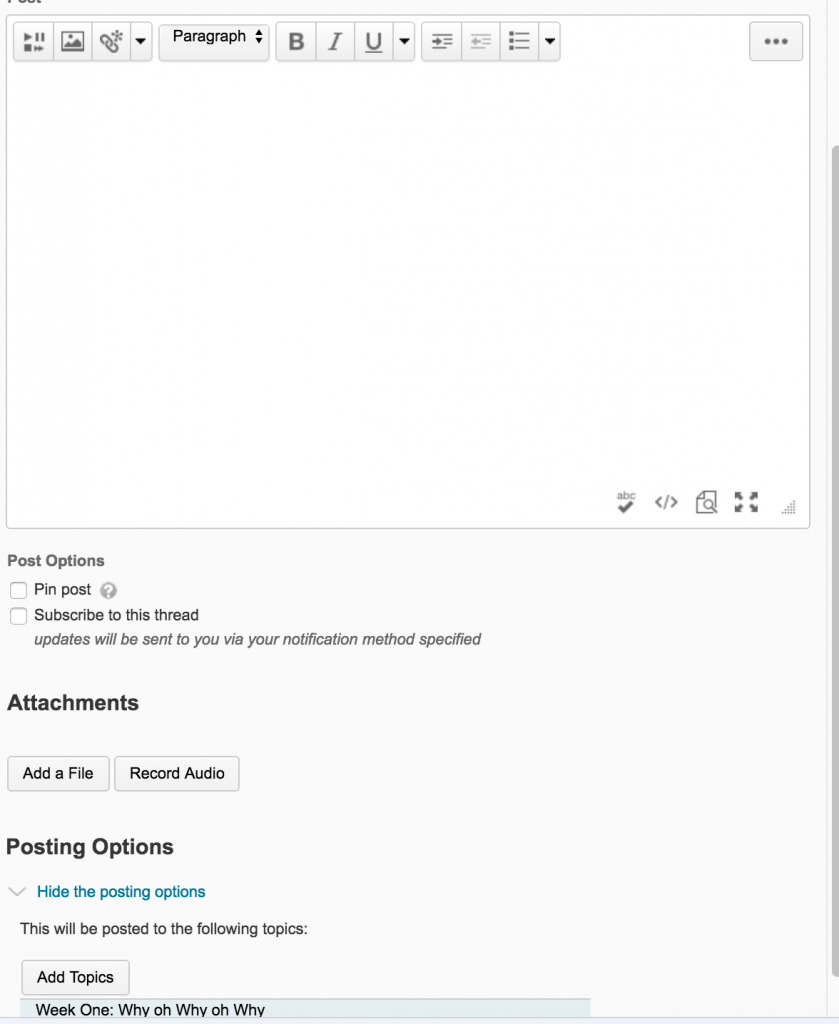
Threads are made up of a series of Posts. To start a new Thread, click Start a New Thread. A new window will appear, title your Thread and then enter any desired text. The post is typed in a Rich Text HTML Editor, so you can easily add images, videos and links to a response.
If you are an instructor you can “pin” a Thread at the top of a Topic so that it will always be the first thread anyone sees in that Topic.
You can also subscribe to Forums, Topics or Threads. If you are subscribed to a Forum, Topic or Thread, anytime someone posts, you will receive a notification.

You can also respond to a student’s Post.
In a Topic, click on the Subject title next to a student’s name. This will open a new pop-up window where you can read a student’s post. To respond, click Reply, enter your text, and then click Post.
You will notice that you have not created a new Thread, but have simply added a new Post to the thread started by the student.
Resources
Division of Information Technology. “Blackboard Collaborate-Master Document.” University of Wisconsin – Madison, https://kb.wisc.edu/page.php?id=39522.
__________. “Learn@UW – About Learn@UW Web Conferencing.” https://kb.wisc.edu/luwmad/page.php?id=21061.
__________. “Learn@UW – Guidelines for Effective Online Discussions.” University of Wisconsin – Madison, https://kb.wisc.edu/page.php?id=39736.
__________. “Learn@UW – How to Create a Discussion Forum and Topic.” University of Wisconsin – Madison, https://kb.wisc.edu/page.php?id=6388.
__________. “Learn@UW – Setting up Web Conferences in Learn@UW.” University of Wisconsin – Madison, https://kb.wisc.edu/page.php?id=21062.

