
Lab 4: PROCEDURE
Restriction Digest
You will be digesting all three PCR products (the HCAII gene and the pETblue2 vector and the negative control) with DpnI. Fortunately for us, DpnI is functional in the PCR reaction buffer. If the enzyme was not compatible with this buffer, you would have to purify the DNA from the reaction, and then digest.
- Add 1 μL DpnI directly to each PCR tube. You should digest all three reactions – including the negative control
- Mix the reactions well by gently flicking the tube with your finger.
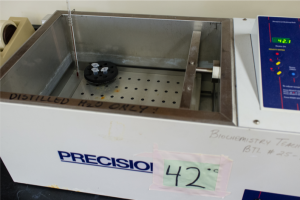
- Briefly centrifuge the samples and incubate at 37 °C for 1 hour.
DNA Purification Column
After the DpnI digests are complete, you will purify the DNA using small spin columns. Note you are also purifying your negative control. Use one column for each reaction. Be sure to label the spin columns so you don’t get them mixed up!
- Add 5× volume of PB buffer to each PCR reaction. (Example: if you have 100 μL of sample, add 500 μL PB). Mix well before moving on to step 3.
- Add the PB buffer + PCR reaction solution (from step 2), to the spin column and spin for 1 min. at 14,000 rpm (>16,000 rcf) in the centrifuge. Be sure to balance the tubes in the centrifuge before you start spinning. Your DNA should now be bound to the column; however, we often recommend that you save the flow-through at this point; if you do not end up with much DNA at the end of the purification, you can determine where you lost it (and whether it can still be recovered).
- Add 750 μL Buffer PE and spin for 1 min. at 14,000 rpm. Again, save the flow-through in the event that you lose your DNA and want to go back and find it later.
- Spin for 1 minute at 14,000 rpm again to dry the column. (Buffer PE contains ethanol, which will interfere with the Gibson assembly reactions if it is not completely removed).
- Place the column into a clean 1.5 mL eppendorf tube labeled with the name of the sample, the date, and your initials.
- Add 30 μL of Elution buffer (EB; 10 mM Tris pH 8.5) to the center of the column and incubate for 1 minute at room temperature.
- Spin for 1 minute at 14,000 rpm in the centrifuge. The flow-through contains your purified product. In order to get the maximum amount of DNA off of the column, add the flow-through back to the center of the column, incubate for one additional minute and then spin for 1 min. at 14,000 rpm in the centrifuge.
- SAVE THE FLOW-THROUGH CONTAINING YOUR DNA.
Determining the DNA Concentration
Once you have purified your PCR product, you will need to determine the concentration of your product. You will use the NanoDrop spectrophotometer to do this.
The following video demonstrates use of the NanoDrop:
- Place 2 μL of EB on the platform of the nanodrop and click on “BLANK” (upper left-hand corner) on the computer.
- To check your blank, place another 2 μL of EB on the platform of the NanoDrop and click on “MEASURE.” The curve should be close to flat and the DNA concentration should read approximately 0. If not, repeat step 1 and check again. If you are still having trouble blanking the instrument, ask your TA for help.
- Once the blank has been completed, place 2 μL of your purified PCR product onto the platform and click on “MEASURE”. Write down the DNA concentration and the 260/280 and 260/230 ratios.
Assembly Reaction
- In lab, you will be provided a video that walks through the following steps:
- Because we want to add equimolar amounts of insert and vector DNA to each reaction, you must start by converting the DNA concentration from ng/μL (as provided by the NanoDrop) into picomoles/μL.
- Determine how much vector DNA you will add to each reaction. For Reactions 1 and 2, try two different amounts of vector DNA. Reaction 3 is a negative control and should contain the lower amount of vector used in reactions 1 or 2 (ideally you would do two negative controls, but to save time and materials we will just do one.)
- If your vector DNA is pretty concentrated (>50 ng/μL), 1 or 2 μL should be plenty.
- If you want to use more than that, note that you may not have the volume of DNA that you think you do. A few microliters are usually lost on the column. You can check the exact volume you have to work with using a pipette.
- Determine how much insert to add to each assembly reaction. For Reactions 1 and 2, use the same number of picomoles of insert as vector. For Reaction 3, use the same volume of the negative control DNA as you did insert in Reaction 1.
- Take care that the total amount of DNA falls between 0.02 – 0.5 pmoles.
Example:
Reaction 1: 0.03 pmol vector, 0.03 pmol insert
Reaction 2: 0.015 pmol vector, 0.015 pmol insert (in 2 μL)
Reaction 3: 0.015 pmol vector, 2 μL negative control DNA
- Set up your reaction as follows, for a final volume of 20 μL:
| ___ | μL Vector DNA |
| ___ | μL Insert (or control) DNA |
| 10 | μL Gibson Assembly Master Mix |
| ___ | μL H20 |
See Appendix for the Gibson Assembly Master Mix recipe (link opens in a new tab): Appendix 4: Buffer formulations
- Incubate the reactions in the thermocycler at 50 °C for 30 minutes.
- Place on ice for a few minutes to cool.
Transformation of E. coli with the assembled DNA
Lab Safety Notice
This is the first 551 lab to utilize E. coli cells. Therefore, you must use aseptic technique as necessary during the lab, since you do not want any foreign bacteria (from your body, clothing, or that may already be present in lab) to contaminate your samples. In addition, anything that you use that touches live bacteria (tips, tubes, etc.) must be disposed of in the orange “Biohazard” trash, to avoid release into the environment. Spills should be cleaned up promptly with a sterilizing solution of bleach or ethanol. (As an additional safety precaution, all of the E. coli strains used in this lab—and in the vast majority of biochemical labs worldwide—are of “K12” strains that are engineered to be non-pathogenic.)
NOTE: Proper aseptic technique (also referred to as “sterile technique”) is a hallmark of all good biochemical researchers. In essence, you must take care to be extra aware of your person and any tools that you are working with. If you touch something that is not sterile (be it a fingertip, sleeve, piece of glassware, cough, etc.) to something that is sterile (a jar, or media, or a plate, etc.), then the sterile object is no longer sterile! You should thus either throw it away, or sterilize it again before using it. If you have any doubt about an object’s sterility, treat it as non-sterile.
- Thaw aliquots of E. coli cells on ice.
- For this lab we are using a strain of E. coli called DH5α. While the cells are thawing, chill three empty 1.5 mL eppendorf tubes on ice. Gently pipette 100 μL of DH5α competent cells into each tube – one for each Gibson reaction.
- Add 10 μL of Gibson assembly reaction to the DH5α cells. Do not pipette up and down to mix! You can mix by gently flicking the tube.
- Incubate for 20 minutes on ice.
- Heat shock for 45 seconds at 42°C. Do not exceed 45 seconds.
- Place on ice for 2 minutes. Do not exceed 2 minutes.
- Transfer your tubes from ice to a rack at room temperature. Add 500 μL SOC (a very rich media). Do not put back on ice once you add the SOC.
- Shake for 45 min. at 37°C in a shaking incubator.
- Spin the transformed E. coli at 4,000 rpm for 1 min. Remove and discard 300 μL of the supernatant. Gently resuspend the pellet in the remaining supernatant.
- Spread the total volume of each transformed E. coli reaction on LB-ampicillin-Xgal plates. Be sure you label your plates with the reaction number, your name and your section. It is best to label the plates around the edge so the writing does not obscure the colonies on the plate.
- Incubate the plates at 37°C overnight.
- Following the overnight incubation, your plates will be placed at 4°C.
